What's new
Photoshop Gurus Forum

Welcome to Photoshop Gurus forum. Register a free account today to become a member! It's completely free. Once signed in, you'll enjoy an ad-free experience and be able to participate on this site by adding your own topics and posts, as well as connect with other members through your own private inbox!

Brushes Another composting / cleaning up question


_alexbrandt_

Well-Known Member
Messages
66
Likes
8
Hello,

Another cleaning up question.
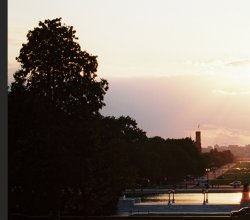
I've got this shot of DC taken over a year ago.
I'd like to remove some ugly details such as some construction cranes and other elements.

Screenshot 2020-11-07 at 22.03.18.jpg

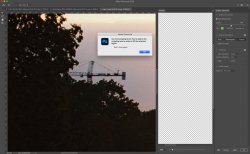
Screenshot 2020-11-07 at 22.03.29.jpg

When I use the healing brush tool, it’s noticeable that something has been done...
How can I blend my healing brush perfectly with the sky?

Screenshot 2020-11-07 at 22.03.37.jpg

Thanks, :)
 
One word of advice I would offer is "patience". Often, people want one tool and one click to achieve a result. In your situation with the crane, you have a complicated sky gradient and not much opportunity to use the clone stamp, healing brush, etc. What I would suggest instead is to re-create the sky by building-up several layers. Here are some approaches I would take.
  • Using the brush tool and the softest setting, take many, many samples of the sky color and manually draw that over the crane. Don't worry, for now, about overlapping with the trees because that can be dealt with later. Do the best you can to sample all the different gradations of the sky and paint them in, allowing for a healthy overlap beyond the crane.
  • Once you've got that done, give that layer a healthy Gaussian blur to create a smooth gradient.
  • At this point, you've gone from nothing (the crane) to something (the new sky). Add a layer mask to this sky layer and mask away only the crane as best you can.
  • From here, you will still see obvious differences between the existing sky and your new sky, but it's much less of a difference vs. the original crane. So now, on a new layer, start again and take many, many samples of the original sky to smooth-over the transition from the original sky to your new sky. It often helps to reduce the brush flow down to 50% or 20% so that you can gradually fade-in the transition from original to new. Once you're done, you may or may not want to apply another Gaussian blur.
  • Once you're happy with the colors, you need to add-back the texture. On a new layer, use the lasso tool to create a rough selection of your new sky. Fill that with 50% gray and change the blend mode to Overlay.
  • Now go to Filter>Noise>Add Noise. Choose Guassian and monochromatic. An Amount of about 5% often works.
  • Give this noise a small Gaussian blur. In this case around 0.4 pixels. Experiment with the layer opacity to make the texture blend in with the rest of the image. In this case, a layer opacity of 100% seems pretty good.
  • Once all of this is done, create a layer mask to bring back all the trees in the foreground. Based on your post above, you've already done a good job with that.
 
Hi Alex -
I was able to get a decent result using the Content Aware fill.
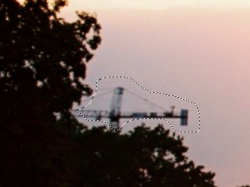
Using Lasso selection tool, draw a selection around the crane - keep it tight (my example is a bit loose):
1604790190277.png

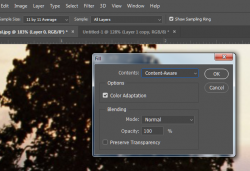
Then click Edit - Fill and choose Content Aware fill in the dialog:

1604790381136.png

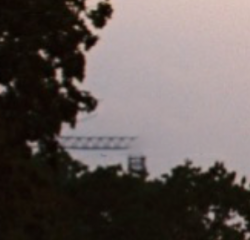
You'll get something like this:

1604790575024.png

Keep using it on remaining bits until you get good coverage - I had to use it 3 times:

For instance:
1604790692188.png

You can use a very soft and small clone stamp tool to make any additional touchups.
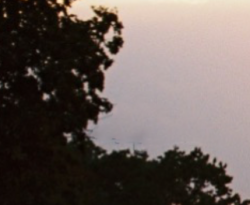
This was my final result:

crane removal edited cropped.jpg
.
Don't work on it as a jpg. If you have it saved as a tiff, that's the best. Or just open the jpg and save as a psd file, then do the work. Don't constantly close and reopen jpgs since it's a lossy file and you'll begin losing quality.
Hope this helps.
- Jeff
 
Hi Alex -
I was able to get a decent result using the Content Aware fill.
Using Lasso selection tool, draw a selection around the crane - keep it tight (my example is a bit loose):
View attachment 116757

Then click Edit - Fill and choose Content Aware fill in the dialog:

View attachment 116758

You'll get something like this:

View attachment 116759

Keep using it on remaining bits until you get good coverage - I had to use it 3 times:

For instance:
View attachment 116760

You can use a very soft and small clone stamp tool to make any additional touchups.
This was my final result:

View attachment 116763
.
Don't work on it as a jpg. If you have it saved as a tiff, that's the best. Or just open the jpg and save as a psd file, then do the work. Don't constantly close and reopen jpgs since it's a lossy file and you'll begin losing quality.
Hope this helps.
- Jeff

Hey Jeff,

Thanks for the tips. Your method seems to be the easiest.
However, I don't exactly have the same options when using the Content-Aware Fill and can't get it to work.

This is what I see

Screenshot 2020-11-09 at 20.07.23.jpg
Screenshot 2020-11-09 at 20.06.56.jpg

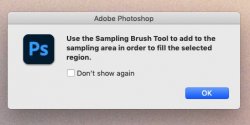
I tried using the Sampling Brush Tool to indeed sample an area close to the crane but the message comes back.

Screenshot 2020-11-09 at 20.06.53.jpg

Any clues?
 
Neverminde. I managed by using Edit-> Fill and then selected Content Aware in the drop-down.
Thanks !
 
OK - I see you're using PS 2020. The tool has changed with this release with some flexible options. I'm using CC 2018.
First - make sure you've chosen the layer that you want to change.
Then head over to Aaron Nace of PHLearn and this video - that should take care of your questions with good eplanations and visuals:


Let us know how you do!

- Jeff
 
Neverminde. I managed by using Edit-> Fill and then selected Content Aware in the drop-down.
Thanks !
OK - glad you got to where you want to go.
But check out the video when you get a chance. The new version (Edit - Content Aware Fill not Edit - Fill) has some interesting options.
PHLearn is a great resource. On his website, he has 30 Days of Photoshop that gives you insights into PS tools in 30 relatively short and free tutorials.
Unmesh Dinda at PIXimperfect also a great teacher. Both have excellent tutorials on YouTube.
Enjoy!
- Jeff
Yeah these PHLearn videos are really good its true.
 

Back
Top