What's new
Photoshop Gurus Forum

Welcome to Photoshop Gurus forum. Register a free account today to become a member! It's completely free. Once signed in, you'll enjoy an ad-free experience and be able to participate on this site by adding your own topics and posts, as well as connect with other members through your own private inbox!

Make transparent areas white.


IsaCreative

New Member
Messages
4
Likes
2
Hey guys, newbie here, and I've got a newbie-type question.

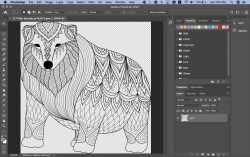
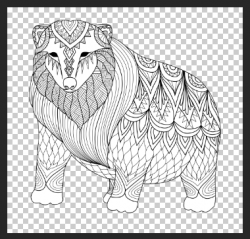
If I've got an image with a subject in it. the subject has some transparency and the background is also transparent.

How can firstly select all the transparent areas inside of the subject excluding the background area.. and then turn the selected areas inside the subject to white?

I have done some searching and found that I can select all the transparency areas in my image by going to

1.select menu
2.load selection
3.layer 1 transparency
4. ticking invert option

this gives me all the transparent areas on my image but from here I've no clue how to
A.deselect the background areas
b.send to new layer if necessary
B.turn the selection to white

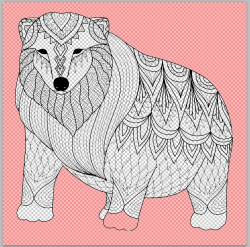
please view the attached image to gain a better understanding of what I mean..

I know this will be an easy fix for some gurus on here... also would be interested to know how I could turn the process into an automated script. but Im probably way ahead of myself there..

thanks in advance gang.:):thumbsup:

Screen Shot 2021-07-03 at 3.00.21 PM.png
 

thebestcpu

Guru
Messages
2,994
Likes
2,760
If you are trying to automate this process then I have a question.
Do the images extend further out so they are completely surround by transparent pixels or do some of the outlines touch the boundary?
John Wheeler
 

thebestcpu

Guru
Messages
2,994
Likes
2,760
Here is an approach that should work in an Action

For this to work the subject needs to have a complete black border.

If you have the entire subject surrounded by transparency by at least a few pixels then follow the steps below. If not, expand the canvas with transparency by a least a few pixels and then continue below

- Select entire image with Cmd+A (Cntl+A for PCs)
- Select > Modify > Border and use 1 pixel
- Select > Grow

At this point the entire background outside the subject is selected

- Shift+Cmd+I (Shift+Cntl+I for PCs) to invert the selection
- Create a new blank Layer above the original Layer
- Press D key to reset the color chips
- Press X key to swap foreground and background chips (white should be foreground now)
- Opt+Delete (Alt+Delete for PCs) to paint white over the entire image
- Set Blend mode of new Layer to Darken
- Cmd+E (Cntl+E) to merge the two Layers

At this point you should have a transparent background outside the subject and painted white where the transparency was inside the subject.

The above could be put in an Action and run on any image that meets the initial criteria.

Hope this does it for you
John Wheeler

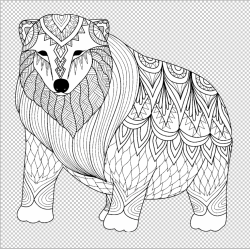
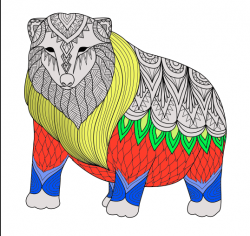
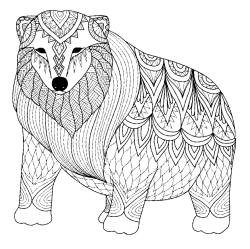
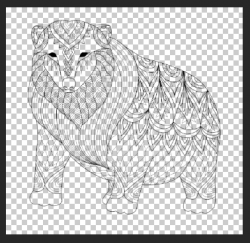
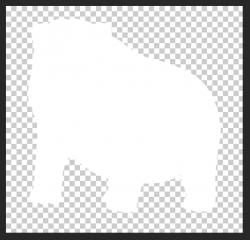
Here is the before and after images of an approximation of your example:

Screen Shot 2021-07-03 at 3.32.29 PM.png


Screen Shot 2021-07-03 at 3.35.13 PM.png
 

IsaCreative

New Member
Messages
4
Likes
2
Here is an approach that should work in an Action

For this to work the subject needs to have a complete black border.

If you have the entire subject surrounded by transparency by at least a few pixels then follow the steps below. If not, expand the canvas with transparency by a least a few pixels and then continue below

- Select entire image with Cmd+A (Cntl+A for PCs)
- Select > Modify > Border and use 1 pixel
- Select > Grow

At this point the entire background outside the subject is selected

- Shift+Cmd+I (Shift+Cntl+I for PCs) to invert the selection
- Create a new blank Layer above the original Layer
- Press D key to reset the color chips
- Press X key to swap foreground and background chips (white should be foreground now)
- Opt+Delete (Alt+Delete for PCs) to paint white over the entire image
- Set Blend mode of new Layer to Darken
- Cmd+E (Cntl+E) to merge the two Layers

At this point you should have a transparent background outside the subject and painted white where the transparency was inside the subject.

The above could be put in an Action and run on any image that meets the initial criteria.

Hope this does it for you
John Wheeler

Here is the before and after images of an approximation of your example:

View attachment 122418


View attachment 122419
Thank you very much, the final image is the intended result I wanted. so I will follow these steps and hopefully get a similar outcome.

I'll update the feed with my results.. much appreciated.
 

IsaCreative

New Member
Messages
4
Likes
2
after increasing the canvas size as you instructedhis worked absolutely perfectly.. you're a star guru. I managed to record the action
Hope that works. There is a chance I typed the instructions incorrectly yet tried to be careful.
John Wheeler
After increasing the canvas size as you instructed, This worked absolutely perfectly.. I managed to record the action as well and it works a treat.. One day when I grow up I will be a star guru like you sir (I'm almost 40 as I write this) :geek:
 

JeffK

Guru
Messages
2,497
Likes
2,898
@thebestcpu - did you create a transparent image from the OPs sample image above in order to show the solution?

Been trying to do that to play with the image but having trouble removing the checkerboard background both outside and inside the subject without disturbing the linework...

- Jeff
 

thebestcpu

Guru
Messages
2,994
Likes
2,760
@thebestcpu - did you create a transparent image from the OPs sample image above in order to show the solution?

Been trying to do that to play with the image but having trouble removing the checkerboard background both outside and inside the subject without disturbing the linework...

- Jeff
Yes I did @JeffK
The transparency grid was lighter tones than the black outlining so decent differentiation. The harder part was the anti-aliasing around the black lines. I think I used a Threshold Adjustment Layer followed by some blurting yet don’t remember the exact steps I took.
 

[ iLLuSioN ]

Power User
Messages
387
Likes
400
I noticed that you are using an eps file and therefore it is possible that your image is available as vector graphic. In this case I would use a vector program such as Illustrator or Inkscape, create an outline and fill it with white color and place the layer below the other paths.
 

JeffK

Guru
Messages
2,497
Likes
2,898
Yes I did @JeffK
The transparency grid was lighter tones than the black outlining so decent differentiation. The harder part was the anti-aliasing around the black lines. I think I used a Threshold Adjustment Layer followed by some blurting yet don’t remember the exact steps I took.
Found the simple way to to get the OP sample to transparent line art - the secret seems to be levels:


Here's my result (scaled down) as a png:

lion line art edited V2.png
Now I can use your PS method to fill with white! :cheesygrin:

Interesting technique to color linework as well - not fill as @IamSam did - which was awesome!

- Jeff
 

thebestcpu

Guru
Messages
2,994
Likes
2,760
Thanks for the video link @JeffK. Always good to know a diversity of ways to get a problem solved.
The trouble I was having and had to watch out for was does the technique keep the solid background all the way around. So took some hand adjustments and trial and error for me. The scanned lines of the digital art had a fair amount of anti-aliasing which was easy to make to thin with any technique I tried.
Even with the technique you describe, I took your image, used the magic wand on the outside perimeter with a tolerance of zero and it still found a pin hole through the outside boundary (I turned on Quick Mask in the image below). There was a small hole in the foot outline. I need to try @[ iLLuSioN ] 's suggestion about using a vector program as maybe a better way to go
Thanks again
John Wheeler

Screen Shot 2021-07-04 at 10.22.26 AM.png
 

JeffK

Guru
Messages
2,497
Likes
2,898
Yep - there was a "leak". Can be repaired with pencil tool.
I was going to try [ iLLuSioN ] method myself...
 

JeffK

Guru
Messages
2,497
Likes
2,898
@thebestcpu - this is the png with the foot repair and filled with white per your details

lion line art edited V2.png

So far I'm not having any luck with Illustrator most likely because of my lack of experience using it. Let me know if it works for you and what process you used...

- Jeff
 

IamSam

Administrator
Staff member
Administrator
Messages
22,752
Likes
13,268
After reading all of this thread, I guess I'm lost. What exactly are you guys trying to do?

I posted the original PNG image in post #12. I thought all we were trying to accomplish was to create a selection of the outline of the illustration to be filled with white leaving the background transparent. Then it was asked if this could be automated.

From this....
Screen Shot 2021-07-04 at 10.39.39 AM.png

....to this.
Screen Shot 2021-07-04 at 10.39.55 AM.png
Screen Shot 2021-07-04 at 10.40.15 AM.png

Are you guys just trying to remove the transparency grid from a screen shot? Or make a selection while the transparency grid is still there?
 

Top