What's new
Photoshop Gurus Forum

Welcome to Photoshop Gurus forum. Register a free account today to become a member! It's completely free. Once signed in, you'll enjoy an ad-free experience and be able to participate on this site by adding your own topics and posts, as well as connect with other members through your own private inbox!
Array shape on a circle


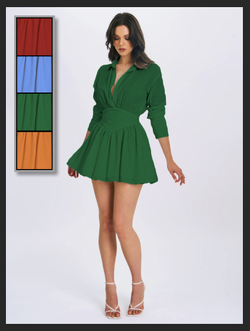
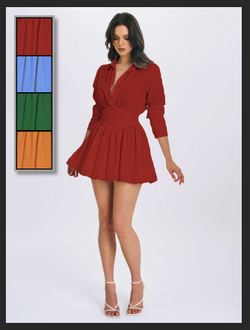
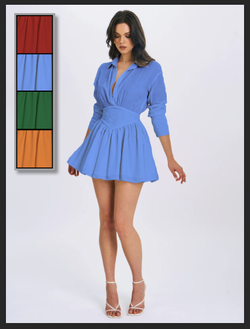
Is this the "HUD" you're referring to???
Screen Shot 2024-10-07 at 11.57.20 AM.png

When you click on a different color fabric, does it change the color of the skirts (tops) and shoes on the girls? If so, I see where you need the smart objects......but you still shouldn't need shape layers in the HUD.
 
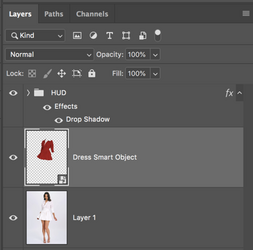
Here's a simple HUD (as I understand it) used to offer a color selection for the dress. None of the panels, within the HUD, which contain colors and fabric texture, are made from shape layers or smart objects. However, a smart object was used for the dress and it's color changes. Regardless, no matter what style of HUD you choose to create, rectangular or round, there's no need for shape layers. BUT...............it's completely irrelevant! You can use them if you wish!

Screen Shot 2024-10-07 at 2.34.17 PM.png Screen Shot 2024-10-07 at 2.33.51 PM.png
Screen Shot 2024-10-07 at 2.33.06 PM.png Screen Shot 2024-10-07 at 2.31.49 PM.png
Screen Shot 2024-10-07 at 2.46.20 PM.png
 
That's it! A HUD in my case is this colourwheel, it can be any shape or design. If you buy my dress, in your case maybe the pants (lol), and you want ALL colours, you would buy the "fatpack" HUD. On that HUD, you can click in the "squares, circles, spaces" and the pants you are wearing turn that fabric or that colour you clicked. This part is done with scripts. I was just told by creators in the game, that smart objects was the way to go ... I don't know 😕
 
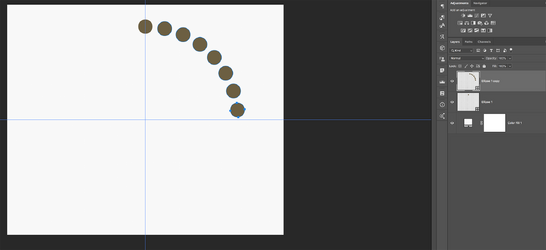
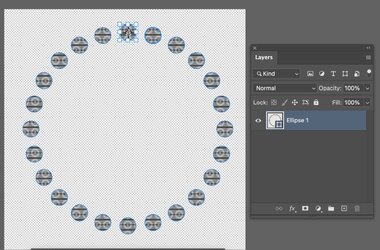
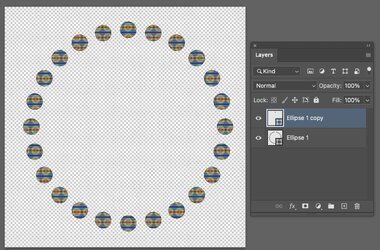
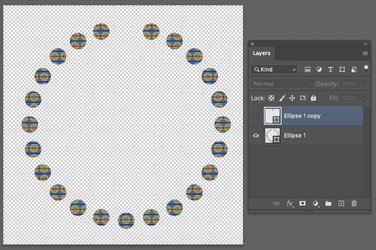
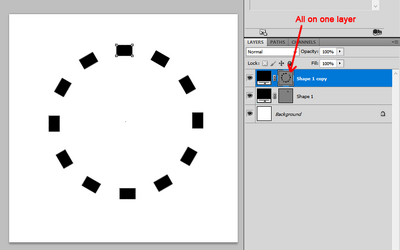
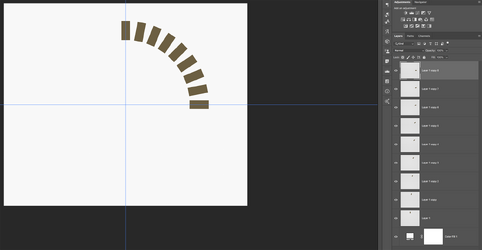
I am on PS v26.8 and trying to do the circle again according to this video I kept. Unfortunately it does not work anymore (for me?) When I click Ctrl + Alt + Shift + T, I don't get separate layers, they are like image below. Is this a version "thing" or a "me problem"?
1760177003583.png
 
Is this a version "thing" or a "me problem"?
Should be a you problem. Note in the video a 1:19 I switch to the Move Tool!

After you make the first ellipse to be copied and moved (not the stroked outline), then copy the ellipse with Cmd/Cntrl + J, switch to the MOVE TOOL, then enter free transform, then move the center pivot and adjust angle and hit OK/enter, then hit Cntrl + Alt + Shift + T and it should place them on separate layers.

If you don't switch to the Move Tool, the step and repeat process will place them all on one layer.
 
When you're creating your small ellipses, are you using the Shape Tool or the Elliptical Marquee Tool? If you apply the command Ctrl+Shft+Alt+T to a vector shape layer, it will rotate all the shapes on one layer, rather than multiple layers. I have replicated this effect below, as you can see in my layers palette.

I have also read that certain versions of Photoshop may have trouble with this Step-and-Repeat process when a Smart Object is involved. I have not been able to replicate that particular problem in my old CS5 version. Smart Objects work just fine and I get a separate layer for each one.

In your screenshot, we can't see what's inside your smart object. But if it's a vector shape layer, then that very likely is your problem.


1760214147256.png
 
I am using the Ellipse Tool (shape tool?). Its late now but I will try it tomorrow. So do I need to use the elliptical marquee tool?
1760221343183.png
 
I am using the Ellipse Tool (shape tool?). Its late now but I will try it tomorrow. So do I need to use the elliptical marquee tool?
View attachment 152572

I suggest you try the elliptical marquee tool just as an experiment to see if that fixes the problem. If switching to the elliptical marquee does not prevent you from doing any other, unrelated steps, then it's probably easiest if you simply use it and move on.

My version of Photoshop is about 15 years old, so it's quite possible that things have changed in newer versions. That said, if you still prefer using the Ellipse (shape) tool, I have a slightly cumbersome work-around that allows the use of Step-and-Repeat (Ctrl+Alt+Shft+T) while working with shape layers.
 
If you apply the command Ctrl+Shft+Alt+T to a vector shape layer, it will rotate all the shapes on one layer, rather than multiple layers.
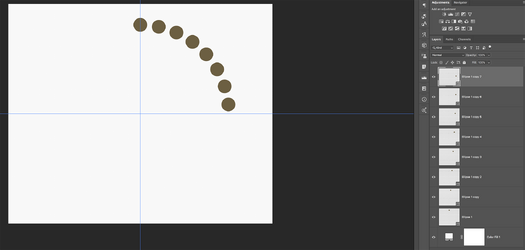
No, only if you're not using the Move Tool

This is a rotated ellipse created with a Shape Tool!! It is a vector shape layer.

Rotation with the Move Tool, individual layers. Note the shape layer icons in the lower right hand corner of the new layers.
Screen Shot 2025-10-11 at 8.46.03 PM.png


Rotation without the Move Tool, single layer. Note the shape layer icons in the lower right hand corner of the new layer.
Screen Shot 2025-10-11 at 8.46.51 PM.png


I did just that but unfortunately when I try again, it still doesn't give me a new layer for each circle
Try starting with a new document and make sure you use the Move Tool

I am using the Ellipse Tool (shape tool?). Its late now but I will try it tomorrow. So do I need to use the elliptical marquee tool?
The Marquee Tool is not a "Shape Tool", it does not create a vector shape. You can use the Marquee Tool for your shapes, but you give up editability.

As Rich stated, if the shape is created with the Marquee Tool, it will rotate with individual layers without the Move Tool. Note there are no icons in the lower right hand corner of the layer.
Screen Shot 2025-10-11 at 9.04.12 PM.png
 
No, only if you're not using the Move Tool
If the shape is created with the Marquee Tool, it will rotate with individual layers without the Move Tool.

In my old CS5, the Move tool is irrelevent. The rotations behave identically whether the Move tool is active or not. Any raster shape will replicate itself on individual layers, but a vector shape will do the rotations all within the same layer. Obviously, this situation has changed in newer versions of PS.

(Probably, the time has come for me to be very selective when replying to "how to" questions because my version of PS is too old. I may inadvertently be adding confusion rather than helping.)
 
Probably, the time has come for me to be very selective when replying to "how to" questions because my version of PS is too old. I may inadvertently be adding confusion rather than helping.
I'm guessing that I should stop replying as well since it's obvious to me that Ps functions are not staying consistent with "step and repeat" across the versions.
 
Should be a you problem. Note in the video a 1:19 I switch to the Move Tool!

After you make the first ellipse to be copied and moved (not the stroked outline), then copy the ellipse with Cmd/Cntrl + J, switch to the MOVE TOOL, then enter free transform, then move the center pivot and adjust angle and hit OK/enter, then hit Cntrl + Alt + Shift + T and it should place them on separate layers.

If you don't switch to the Move Tool, the step and repeat process will place them all on one layer.

I am doing exactly that. After switching to move tool, I place the pivot in the center of the large circle (shape). After I do that, the move tool is not activated. I Ctrl + Alt + Shift + T (always hold but keep clicking "T", it does not place circles on a separate layer. I wanted to post a mp4 how I do it, but it doesn't accept that format. It is driving me nuts.
 
After I do that, the move tool is not activated
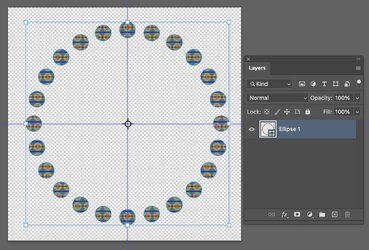
This does not sound correct. The Move Tool would not be "active" or "actively showing" ONLY during the free transform, but once you hit OK/Enter, the Move Tool returns.

After you move the second/copied rectangle or circle using free transform, you need to hit enter to accept the state change, then you hit Shift + Opt/alt + Com/Cntrl + T (step and repeat).

When you use either of the Marquis Tools to create your Circle or rectangle, the step and repeat process will always place the copies on their own separate layers!!

If this does not work for you, then this is a "version" issue and I cant help you anymore.
 
Hi @Alexandria
I think you want to end up with each of the ellipses being on their own Shape Layer so you can set each shape individually to your own desired texture.

The steps below will show you how to achieve this (if that is what you want)

First, you do the step and repeat option of a single shape Layer and yes it puts them all on the same Layer (I assume you know how to do this step as you said you did this in a previous post)

What I show you is how to move each elipse to its own Shape Layer

I start with the single overall Shape Layer in a circle as shown in the next image with the Layer Stack:

Screenshot 2025-10-22 at 10.39.56 PM.jpg

Now use the Path Selection tool to click on one of the ellipses (The keyboard shortcut to select this tool is "A"). Note that I have selected the one subpath of the Shape at the top:

Screenshot 2025-10-22 at 11.23.06 PM.jpg

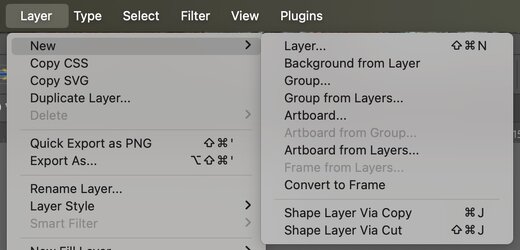
From here, you use the command New > Layer >Shape Layer via cut (or keyboard shortcut Shift+Cmd+J (Shift +Cntl+J on PC). This cuts this portion and places it on its own Layer:
Screenshot 2025-10-22 at 11.23.24 PM.jpg

Screenshot 2025-10-22 at 11.23.53 PM.jpg

It is now on its own Layer. In this next image I turn off the visibility of that New Layer to show you its been cut out from the original Layer:

Screenshot 2025-10-22 at 11.24.11 PM.jpg

You do this with each of the individual sub shapes to cut them and get them on their own Layer. You have to start by selecting the bottom Layer from which you want to extract them from.

When it is all done, the bottom Layer will be empty and all the sub-shapes will be on their own Layer where you can assign Shape characteristics individually to each piece.

Note, there was a feature in Photoshop Beta that did this automatically, yet Adobe withdrew it as it had problems with more complicated shapes. It may be in the next release, yet don't hold your breath.

A Photoshop script can also do this, yet if there is any problem with the script, it isn't easy to debug with forum posts. So I will leave this existing option for you to consider
Hope this helps
John Wheeler
 
Another idea. With the following script, you can choose the radius of the main circle, the number of small circles (21 in your example) and the radius of small circles.
To create exactly the same example, you may use following values :
1 - Main circle radius : 315
2 - Number of circles : 21
3 - Small circles values : 43
The script.
That is very cool thank you, but I need the circles to be smart objects where I can place an image
 
That is very cool thank you, but I need the circles to be smart objects where I can place an image
See this post:
 
See this post:
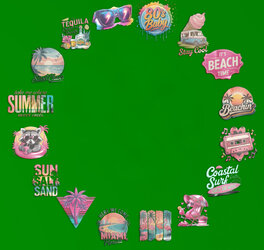
Right ... so this is what I am trying to do, again being able to change the small images at any given time. The images are on a transparent background (green only for viewing purposes) and for that I need a "smart object layer", right? The layer where I can click bottom right and a new window opens, I put the image in it and press X to close ... and its done?

wheel.jpg
 
Right ... so this is what I am trying to do, again being able to change the small images at any given time.
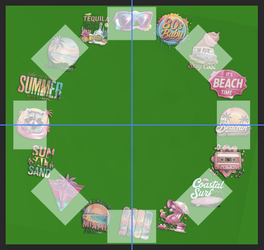
This, based on the actual size variations and proximity of the objects/images/logos appearing in your sample image, is a much different technique than what your original topic was about. This would be more about arranging images in a circle than using smart object layers. Each smart object layer would have to be custom fit with a specific boundary to accommodate the varied images. Trying to use Smart Objects is a waste of time! This would not be how I would go about creating this type of circular graphic. This would be much more simple by arranging the images around a circle with basic Ps layers and groups.

But, if you really want to use SO's, Custom rectangles for each logo. I turned every other one off and did not edit each rectangle yet. I'm not going to do this because it's way more trouble than I want to do right now! Another major pain because it would be trial and error trying to adjust the proper angle of the logo inside the PSB file so it appears straight in the graphic!!
Screen Shot 2025-11-19 at 1.09.44 PM.png
 

Back
Top