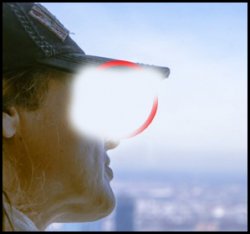
Ok, got it. Hopefully, you understand Layer Masks. If not, it's one of the most basic and essential things to know in Photoshop. You can find many tutorials in YouTube on layer masks for beginners. "Phlearn" is a good one.
Anyway, the basic approach to your image is to find an appropriate sample of the sky color to cover the dark part of the hat. If it were a complicated sky with lots of variations in color, you could use the Clone Stamp to sample the sky and then stamp it over the dark part of the hat (always working on a new layer—never work direcly on the image itself). In this case, the sky in the area of interest is mostly a white-ish cloud color, so I simply sampled that white cloud color and then took a big soft brush and painted the sky color on a
new layer. For this first step, you want to
deliberately paint too much of the sky color, something like this below. No need to be careful here—just paint a big area of the desired color.

Now, click the Layer Mask icon to create a layer mask on this new layer that you just made. With the layer mask activated, go to Edit>Fill>Black. You have now filled the layer mask with black, which makes your sky color completely disappear and you are right back where you started.
Now adjust your brush to roughly 50% hardness. Working in the layer mask, paint in the mask with white to reveal the underlying sky color. Take your time to carefully trace around the bridge of the nose, etc. to slowly reveal the sky. If you make a mistake and reveal too much sky, then switch the brush color to black and paint in the layer mask to correct your mistake. Then switch back to white to continue. Keep going until you've carefully outlined her face and the part of the hat brim that you want to keep, and then you're basically done. (Hopefully, you have a graphic tablet and stylus. It's pretty hard to do careful masking with a mouse.)
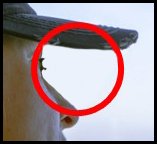
The hardest part will be her eyes because there is very little contrast between the hat and her eyelashes, so it's hard to see what you're doing. You'll have to rely on your artistic ability to make the eyes and eyelashes look natural. One tip for this is to reduce the brush Flow (or Opacity) to about 5%. This means that each brush stroke will only be 5% of normal strength, which allows you to very gradually feather the edges of the eyelashes within the mask to gradually achieve the desired look. Be patient in this eye area. Your final result should look something like this (but, of course, without the red circle).
