What's new
Photoshop Gurus Forum

Welcome to Photoshop Gurus forum. Register a free account today to become a member! It's completely free. Once signed in, you'll enjoy an ad-free experience and be able to participate on this site by adding your own topics and posts, as well as connect with other members through your own private inbox!
How to get this border effect and the texture effect?


dineshtendulkar

Well-Known Member
Messages
52
Likes
9
Hi,

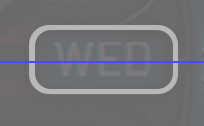
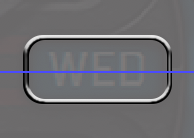
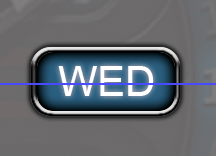
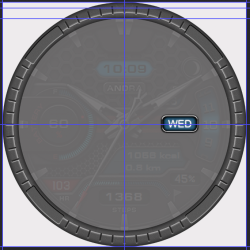
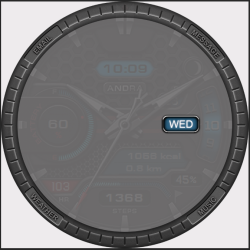
I want to get the border effect "around WED" same as the below image. How to achieve that, detailed tutorial plz.

Thanks in advance

icon-1.png
 

IamSam

Administrator
Staff member
Administrator
Messages
22,765
Likes
13,269
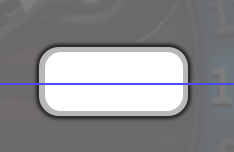
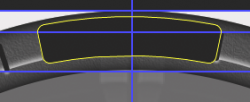
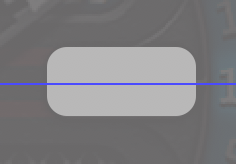
Create a rounded rectangle to match the "outer" rectangle of the reference image.
Make it's color grey.
Match the corner radii.
This has a 20px corner radius.
Screen Shot 2021-12-15 at 11.53.17 PM.png

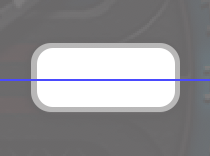
Next, on a new layer, create an "inner" rounded rectangle.
Make it's color white.
Match the corner radii.
This has a 16px corner radius.
Screen Shot 2021-12-15 at 11.53.41 PM.png

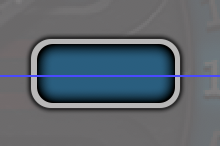
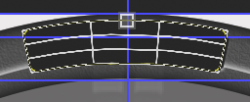
Select the "outer" rectangle and double click.
Add a black "Outer Glow" layer style.
Screen Shot 2021-12-15 at 11.54.03 PM.png

Select the "Inner" rectangle and double click.
Add a black "Inner Glow" and a "Color Overlay" layer style.
Screen Shot 2021-12-15 at 11.54.11 PM.png

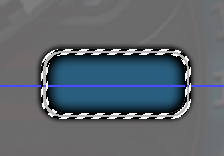
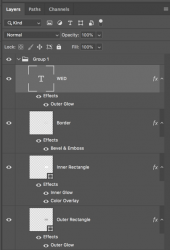
Create a new layer and name it "Border".
Make a selection of the inner and outer rectangle layers.
(Cmd/Cntrl + click layer "Outer Rectangle" thumbnail, then Opt/Alt + Cmd/Cntrl + click "Inner Rectangle thumbnail.)
Screen Shot 2021-12-15 at 11.54.23 PM.png

On the "Border" Layer, fill the selection with med grey.
Cmd/Cntrl + D to deselect.
(Note: This is the border layer with the other two layers turned off.)
Screen Shot 2021-12-15 at 11.54.44 PM.png

Now add a "Bevel & Emboss" layer style to the border.
Screen Shot 2021-12-15 at 11.54.51 PM.png

Turn all layers on and add a type layer.
Screen Shot 2021-12-15 at 11.55.07 PM.png

Screen Shot 2021-12-16 at 8.57.53 PM.png
 

dineshtendulkar

Well-Known Member
Messages
52
Likes
9
Hi sir, Thank you for the tutorial.

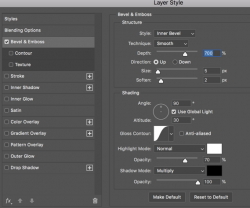
Will you please share the bevel and emboss values you used. I have a doubt, when you are briefing the tutorials, for the effects such as gradients, bevel, etc., why are you not specifying the values. When we are trying with differnt values, we are getting some other result. It would be good if you share those values also
I tried but it didn't came well as yours.

WED.png
 

IamSam

Administrator
Staff member
Administrator
Messages
22,765
Likes
13,269
Will you please share the bevel and emboss values you used. I have a doubt, when you are briefing the tutorials, for the effects such as gradients, bevel, etc., why are you not specifying the values. When we are trying with differnt values, we are getting some other result. It would be good if you share those values also
Ok, the main reason why I usually will not post specific values used in layer styles is that when it comes to layer styles, we all have our own preferences. What I think may look right, others may not. I don't post the values I use because you are meant to use the values that you find acceptable, I simply tell you that I used a specific type of layer style.

Please notice that there are several references to layer styles in the tutorial. I mention an "Outer Glow", "Inner Glow", and a "Color Overlay". You did not ask about these layer style values because you created your own. It's my intention that you experiment and create your own! This is how you learn.

BUT, I'm not opposed to posting my values for this effect.
Screen Shot 2021-12-18 at 8.19.20 AM.png
 

IamSam

Administrator
Staff member
Administrator
Messages
22,765
Likes
13,269
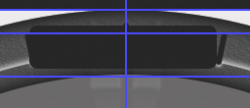
Will you also please share how to do that boxes written as "Email", "Message", etc.,
Sure.

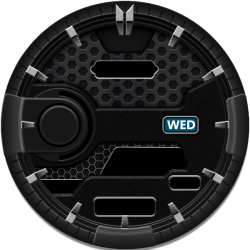
Here is the first step in how I would approach the "Function Windows".

Create a rounded rectangle with the Rounded Rectangle Tool. Only use Ps shape tools. Do not rastorize this layer at any time.
(this example is slightly off center...I did it really fast....you take your time!)
Screen Shot 2021-12-18 at 8.24.35 AM.png

Enter Free Transform > Cmd/Cntrl + T
Screen Shot 2021-12-18 at 8.25.01 AM.png

Click on this icon....
Screen Shot 2021-12-18 at 8.25.09 AM.png

Under the "Warp" drop-down menu, choose "Arc"
Screen Shot 2021-12-18 at 8.25.18 AM.png

Adjust the "Bend" to your liking.
Screen Shot 2021-12-18 at 8.25.56 AM.png

When you have the "Arc" where you like it, hit enter.
Screen Shot 2021-12-18 at 8.26.02 AM.png

Name this new (shape) layer - "Window 1"
Done.......for this step.
Screen Shot 2021-12-18 at 8.26.14 AM.png
 

IamSam

Administrator
Staff member
Administrator
Messages
22,765
Likes
13,269
Step two.

Now to rotate "Window 1"

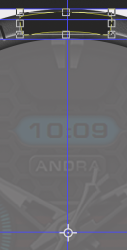
Enter Free Transform and move the pivot point to the center of the document. You will have to go to full zoom when positioning the pivot point.
Screen Shot 2021-12-18 at 8.38.45 AM.png

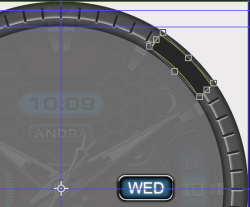
Now hold down the shift key and rotate "Window 1" to a 45 degree position. It will snap into position.
Screen Shot 2021-12-18 at 4.44.04 PM.png

Hit enter or the tick/check mark to accept the state change.

Make a copy of "Window 1" layer and rename "Window 2". Repeat the above steps until done.

Add a "Bevel & Emboss" layer style to "Window 1". Copy the layer style to the other windows.
Screen Shot 2021-12-18 at 12.24.23 AM.png
 

IamSam

Administrator
Staff member
Administrator
Messages
22,765
Likes
13,269
The last thing is the text.

I did this using a simple "Text on a Path" technique. After looking through several tutorials, I feel that this TUTORIAL is most up to date and best describes how to place text on a path.

I did create four (4) separate layers with separate paths for each "Function Window".

Lastly, I added a layer style using pattern overlay (for texture), outer glow, and drop shadow.

Screen Shot 2021-12-19 at 3.11.46 PM.png
 

dineshtendulkar

Well-Known Member
Messages
52
Likes
9
Step two.

Now to rotate "Window 1"

Enter Free Transform and move the pivot point to the center of the document. You will have to go to full zoom when positioning the pivot point.
View attachment 126558

Now hold down the shift key and rotate "Window 1" to a 45 degree position. It will snap into position.
View attachment 126564

Hit enter or the tick/check mark to accept the state change.

Make a copy of "Window 1" layer and rename "Window 2". Repeat the above steps until done.

Add a layer style to "Window 1". Copy the layer style to the other windows.
View attachment 126561
Hi sir,

Thank you so much for these detailed tutorials. Will you please share the values for the following

1. Gradient values used above for the circular bezel
2. Layer Style & its values for the lines and the text area
 

dineshtendulkar

Well-Known Member
Messages
52
Likes
9
The last thing is the text.

I did this using a simple "Text on a Path" technique. After looking through several tutorials, I feel that this TUTORIAL is most up to date and best describes how to place text on a path.

I did create four (4) separate layers with separate paths for each "Function Window".

Lastly, I added a layer style using pattern overlay (for texture), outer glow, and drop shadow.

View attachment 126565
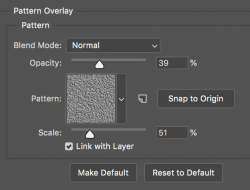
Woow. This is the exact text effect am looking for. Will you please share the layer style values. plz
 

IamSam

Administrator
Staff member
Administrator
Messages
22,765
Likes
13,269
Thank you so much for these detailed tutorials.
You're very welcome!

Will you please share the values for the following
I have discussed posting layer style values above in post #5. The matter of what values I'm using has no bearing on what you should be using. We are all different in what we perceive looks best. Even with these layer styles used on everything I have demonstrated for you in all of these tutorials, I've had to experiment! This is what I need for you to do!! It's the only way you learn. I have told you what effect I used, but you need to experiment with the values YOU LIKE on your own.

Please look at your project in post #3! Which looks awesome by the way!! You are more accurately trying to emulate the original sample image. I am NOT! My colors are generic as well as the graphic components! The values I have or did use on my demo will not work with your project! They will not interact with your colors. You have to experiment to see what works best for your situation!

1. Gradient values used above for the circular bezel
The matter of the bezel and dial with second/minute markers have not yet been opened in this thread. I made the bezel since you asked about the function widows. I felt like it would demonstrate the function windows better. There is no gradient in the bezel. There is a very simple "Inner Glow" using black as it's color and a "Pattern Overlay" (listed below).

2. Layer Style & its values for the lines and the text area
I assume you mean the second/minute markers? I used a very simple Bevel & Emboss.

This is the exact text effect am looking for. Will you please share the layer style values.
As I have stated above in the demo, I used a layer style using pattern overlay (for texture), a simple outer glow, and a simple drop shadow.

As for the pattern overlay, you may not even have the same pattern uploaded in your Ps. It's called stucco. Not sure if it's in Ps already, you will have to look.
If you can't find it in presets, download and load this pattern from here: https://www.mediafire.com/file/xpo16gvuvuui5sd/Stucco.pat/file
But the pattern texture does not appear on your original sample image..............it just looks good to me! Your original sample image has no pattern texture on the Bezel/Dial.
Screen Shot 2021-12-19 at 11.55.37 AM.png
 

Top