What's new
Photoshop Gurus Forum

Welcome to Photoshop Gurus forum. Register a free account today to become a member! It's completely free. Once signed in, you'll enjoy an ad-free experience and be able to participate on this site by adding your own topics and posts, as well as connect with other members through your own private inbox!

Mockup for invitation cards


oodya

Well-Known Member
Messages
79
Likes
10
Hello,

I was wondering if someone can help?

I sell a range of DL invitation cards. One set usually includes the invitation card itself, the insert (or maybe 2) and an envelope.

I have recently been looking at mockups and wondering if someone can point me in the right direction - as I think mockups might be able to help me display the invitation cards in a good way.

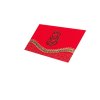
I have an envelope which is: 21.8cm wide x 11cm high
The invitation card is:21cm wide x 10.5cm high
The insert is 20.5cm wide x 10cm high.

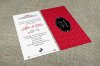
If anyone knows of any tutorials or can help me get started, that would be wonderful. I have attached an image of what I think looks nice (plus I would like to have the option to add an insert if I need to).

I am open to any suggestions / recommendations,

Any assistance will be much appreciated.

Thank you,

Oodya
 

Attachments

  • invitation mockup.jpg
    invitation mockup.jpg
    186.3 KB · Views: 30

fredfish

Guru
Messages
887
Likes
1,247
I suspect that this tutorial may get you started.


If you need more info ask again :)

Cheers

John
 

oodya

Well-Known Member
Messages
79
Likes
10
Hello fredfish,

Thank you for your message. I have now had a look at the video. However, I have photo of an insert and invitation card (please see the attached 'image'. I'm finding it difficult to only select the insert section (please see the arrow. When I feel like I have got some of it and I click on convert to smart object,upon double clicking on it to edit it, I do not get a flat file, but rather a replica of the selected pixels (please see the attached smart object file).

I'm sure I'm missing something.

Can you help?

Thanks,

Oodya
 

Attachments

  • smart object.jpg
    smart object.jpg
    88.2 KB · Views: 1
  • image.jpg
    image.jpg
    216 KB · Views: 2

fredfish

Guru
Messages
887
Likes
1,247
Try creating the layer as a regular shape first (EG a rectangle).
Then convert the layer to a smart object
Then distort the image using the free transform tool so that it fits the shape you want
Now when you double click on the smart object layer you should get the rectangle open up in a new tab as a .psb file
Edit this file to your new insert and close the .psb (choosing yes when it asks you if you want to save the file)

That should work.

Let me know how you get on!

Cheers

John
 

oodya

Well-Known Member
Messages
79
Likes
10
That worked great - thank you. Just one final question - what would you do to select the card where the arrow is pointing - I have tried the distort and warp but it doesn't seem to like it.

Thanks again!

Oodya
 

fredfish

Guru
Messages
887
Likes
1,247
Hi again

I am sorry - I am sure it is me, but I dont quite see what you are getting at?

Do you mean that you have a file that has an insert already there and you want to select that existing insert and edit it? Or do you mean that you want re-create something similar yourself?

As I said it is probably me! :)
 

oodya

Well-Known Member
Messages
79
Likes
10
Hello,

Thank you for your message. So say I wanted to create a completely new mockup from scratch. What would be the best way to perfect the perspective. If I had 3 flat rectangles (one for the invitation card, one for the insert and one for the envelope all perfectly sized), how would I lay them out so I could get the same / similar look to the first attachment I showed.

I am also looking to do this for an A5 invitation card with an envelope and insert.

Any suggestions are welcome.

Thank you,

Oodya
 

IamSam

Administrator
Staff member
Administrator
Messages
22,721
Likes
13,258
OK, if I'm following you, the best way is to do it like the video that fredfish provided in post #2.
 

IamSam

Administrator
Staff member
Administrator
Messages
22,721
Likes
13,258
The perspective adjustment of the smart object rectangle does not have to be exact, you can have it overlapping and then you can add a layer mask created with the Pen Tool.

Here is the SO rectangle after I transformed it...
Screen Shot 2016-10-15 at 1.52.23 PM.png

Here is a selection that I made with the pen Tool....
Screen Shot 2016-10-15 at 1.52.39 PM.png

Here's how it will look after the layer mask is applied....
Screen Shot 2016-10-15 at 1.52.50 PM.png

Screen Shot 2016-10-15 at 1.56.24 PM.png
 

oodya

Well-Known Member
Messages
79
Likes
10
Hello,

Thank you for your message.

In the first image, you have like a perfect rectangle after you transformed it. How can I make a perfect rectangle and keep the image looking perfect?

Is it just trial and error - or is there some calculation to it / tool?

I have attached my original image and another one that I have tried to distort, but the angles do not seem correct.

Any advise?

Thank you,

Oodya
 

Attachments

  • distort.jpg
    distort.jpg
    84.6 KB · Views: 0
  • original.png
    original.png
    1.1 MB · Views: 2

oodya

Well-Known Member
Messages
79
Likes
10
Hello,

So say I wanted an invitation card, an envelope and an insert all together - how can I get the proportions perfect and all looking like a complete set?
 

IamSam

Administrator
Staff member
Administrator
Messages
22,721
Likes
13,258
oodya said:
In the first image, you have like a perfect rectangle after you transformed it. How can I make a perfect rectangle and keep the image looking perfect?.......Is it just trial and error - or is there some calculation to it / tool?
I did so using Free Transform and the distort option. I simply followed the existing lines of the original card. There is some amount of trial an error but not much, mostly just following the cards edges.

oodya said:
I have attached my original image and another one that I have tried to distort, but the angles do not seem correct. Any advise?
Well, none that I haven't already provided. If you can't get the edges absolutely correct using the free transform with distort and warp, then overlap the edges and use a layer mask and the Pen Tool to get the edges perfect.
However, I will say that there should be no reason why the free transform method should not work.

oodya said:
So say I wanted an invitation card, an envelope and an insert all together - how can I get the proportions perfect and all looking like a complete set?
You would make a Smart object triangle for each one and use free transform to place.

Why don't you post your card, envelope, and insert so we can go through the process.
 

oodya

Well-Known Member
Messages
79
Likes
10
Hello,

Thank you for your message. Please see the attached files.

The envelope size is: 28.5cm wide x 13.5cm high
The invitation size is: 27.5cm wide x 12cm high
The insert size is: 25.1cm wide x 11.5cm high

Any help would be much appreciated.

Thanks,

Oodya
 

Attachments

  • envelope.jpg
    envelope.jpg
    1 MB · Views: 4
  • insert.jpg
    insert.jpg
    1.4 MB · Views: 2
  • invitation card.jpg
    invitation card.jpg
    2.2 MB · Views: 2
Last edited:

IamSam

Administrator
Staff member
Administrator
Messages
22,721
Likes
13,258
Ok, I have gone back a re-read this thread several times. I'm very sorry but I'm not sure where to go from here. I really don't know what your needing.

If your inquiring about mock-ups, you don't create a perspective rectangle on your own, you match the rectangle to one that already exists. Let me try to explain.

Here is the original image.
The image contains two rectangles.
This is the starting point for everything that follows.
Screen Shot 2016-10-16 at 5.55.24 PM.png


If I want to change what's on the left rectangle, I do exactly as the video instructed.
As in the video, I will match the Smart Object rectangle (that you have to create) to the existing rectangle in the image.
It will then look like this.
Screen Shot 2016-10-16 at 5.49.59 PM.png

Now that I have the Smart Object rectangle matched to the rectangle in the image, if I want to change that image, all I need to do is edit the smart object.
It will then look like this.
Screen Shot 2016-10-16 at 5.49.34 PM.png

This process is explained in the video.

I really want to help you but I'm not at all sure what your needing! Sorry.
 

IamSam

Administrator
Staff member
Administrator
Messages
22,721
Likes
13,258
Take a look at this video. It explains the process as well.
[video]https://phlearn.com/how-to-make-a-billboard-advertisement-in-photoshop[/video]
 

oodya

Well-Known Member
Messages
79
Likes
10
Hello,

Thank you for your message. So say I wanted to create a mockup completely from scratch using my above 3 images (envelope, invitation and insert). Would I first need to get the physical invitation card, lay them out on a table.take real life photos of them, then amend them using smart objects in Photoshop? Or is there a way whereby I can use the scanned files (as above) and transform them using Photoshop to make them look as though they are laid out on a table?

Sorry for any confusion and I hope this makes sense?

Thanks,

Oodya
 

fredfish

Guru
Messages
887
Likes
1,247
Hi again

The problem is the orientation of the background that you want to use. If it were perfectly alligned then you could use the "Perspective" option in the free transform tool. But life isnt like that! :)

If I were you I would look up "Perspective grids in Photoshop" in google and have a read. https://www.google.co.uk/webhp?sour...&espv=2&ie=UTF-8#q=perspective grid photoshop

I would create a perspective grid overlay over the table to match up with the orientation of your table and then use that as a guide for using "Distort" in the free transform tool to create the correct look.

Have you got a picture of the table top as well? or even something as a suggestion?

Cheers

John
 

fredfish

Guru
Messages
887
Likes
1,247
Looking in to it slightly further you could try using the Vanishing point filter to create a perspective grid (making sure that you render to photoshop on a new layer).

This will create a grid for what ever table you want to use.

I will try to post some more info.

Cheers

John
 

fredfish

Guru
Messages
887
Likes
1,247
A quick video to show you just one of the ways you can do it. To be honest after a little practice you probably wont need the grid!

[video=youtube_share;LfE5cFqwpQc]https://youtu.be/LfE5cFqwpQc[/video]

Cheers

John
 

IamSam

Administrator
Staff member
Administrator
Messages
22,721
Likes
13,258
So say I wanted to create a mockup completely from scratch using my above 3 images (envelope, invitation and insert). Would I first need to get the physical invitation card, lay them out on a table.take real life photos of them, then amend them using smart objects in Photoshop? Or is there a way whereby I can use the scanned files (as above) and transform them using Photoshop to make them look as though they are laid out on a table?
Yes, now I understand! It was the term "mock up" that was causing the problem.

You can do it either way! I think fredfish has found the best way do what your asking.
 

Top