What's new
Photoshop Gurus Forum

Welcome to Photoshop Gurus forum. Register a free account today to become a member! It's completely free. Once signed in, you'll enjoy an ad-free experience and be able to participate on this site by adding your own topics and posts, as well as connect with other members through your own private inbox!

Brushes Removing large background object


_alexbrandt_

Well-Known Member
Messages
66
Likes
8
Hello all,

I'm pretty new to Photoshop which I'm currently learning to use.
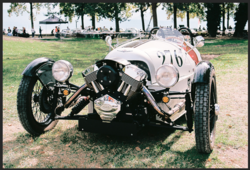
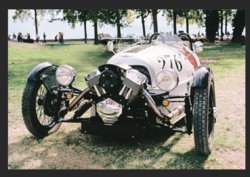
I've got a picture I took of a car. I'm trying to remove some of the ugly background from it; mainly the hose roller on the left of the car, probably the blue tent as well.

R1-05611-0031-Edit-Edit.jpg

I made a mask of the upper left area of the picture, not including the car to allow me to work with the healing brush tool without affecting the car area but only the background.
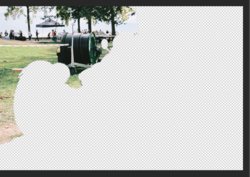
Screen Shot 2018-11-05 at 17.33.09.jpg

The issue I'm running into is that that black hose roller is large. When I try to sample areas at the left of it with the healing brush, I quickly find myself limited in the scope of material I can sample from. For example, I get a straight border of the left part of the image if I chose "Aligned" or eventually the wheel of the car start appearing.

How can I solve this ?
 

IamSam

Administrator
Staff member
Administrator
Messages
22,721
Likes
13,258
Hello and welcome.

Use the Clone Stamp Tool and not the Healing Brush.
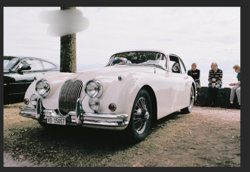
I did this very fast with the Clone Stamp Tool.....
Screen Shot 2018-11-07 at 12.16.41 PM.png

Also, Select and borrow from other areas of the image or another image with similar background material.
 

_alexbrandt_

Well-Known Member
Messages
66
Likes
8
Hello and welcome.

Use the Clone Stamp Tool and not the Healing Brush.
I did this very fast with the Clone Stamp Tool.....
View attachment 93185

Also, Select and borrow from other areas of the image or another image with similar background material.

Hey, thanks for the tip. Indeed I'm managing with the clone stamp. The top of the object is trickier but some patience should help.

Thank you.
Alexandre
 

IamSam

Administrator
Staff member
Administrator
Messages
22,721
Likes
13,258
_alexbrandt_ said:
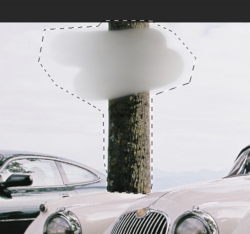
I'm trying to remove a simple tree trunk from a picture.
I'm using the Healing Brush, but here is the look of what I get with 2,3 stokes.

Is that like some joke from Adobe ?
Screen Shot 2018-11-07 at 19.47.00.2.jpg

Don't use the Healing Brush Tool............use the Clone Stamp Tool.

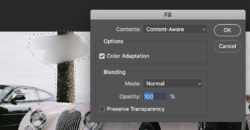
You can also SELECT > FILL > content aware.
Screen Shot 2018-11-07 at 1.20.59 PM.png

Screen Shot 2018-11-07 at 1.21.13 PM.png

Screen Shot 2018-11-07 at 1.21.32 PM.png

Now Clean up with Clone Stamp and Brush Tool.
 

IamSam

Administrator
Staff member
Administrator
Messages
22,721
Likes
13,258
The Healing Brush Tool is not the right tool for what your trying to do. It samples from the area where you make the stroke to perform the healing so you will get the muddy result when light areas are accompanied with areas containing darker pixels...........this is normal for that tool and not a joke from Adobe. It's not used for what your trying to use it for.
 

_alexbrandt_

Well-Known Member
Messages
66
Likes
8
The Healing Brush Tool is not the right tool for what your trying to do. It samples from the area where you make the stroke to perform the healing so you will get the muddy result when light areas are accompanied with areas containing darker pixels...........this is normal for that tool and not a joke from Adobe. It's not used for what your trying to use it for.

Ok, I see. It's trying to blend the different colors together thars why it gets messy. Thanks.
 

IamSam

Administrator
Staff member
Administrator
Messages
22,721
Likes
13,258
Looks good. Watch out for repeating pixel patterns. Sample often.
 

_alexbrandt_

Well-Known Member
Messages
66
Likes
8
Ok, I'm running into another newbie problem again - editing a mask.

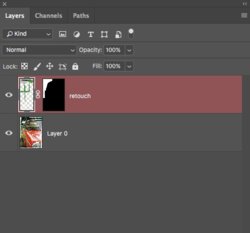
I'd like to edit the mask to change its area by using white / black brush to adjust. Right now my mask is hiding areas at the top that I want to retouch. I made it to prevent touching the car...
When I select my retouch layer in Layer panel, with the mask linked to it, when I hit "Q" for quick mask mode, it becomes red but the mask itself doesn't appear in the image.

Any ideas what I'm doing wrong ?
 

IamSam

Administrator
Staff member
Administrator
Messages
22,721
Likes
13,258
Any ideas what I'm doing wrong ?
It's not that it's wrong, but there's no need to use the quick mask on an existing layer mask. Just use the Brush Tool set to black or white (or any shade in between) to adjust the layer mask. Alspo remember that you can adjust the brush settings as well.
 

_alexbrandt_

Well-Known Member
Messages
66
Likes
8
It's not that it's wrong, but there's no need to use the quick mask on an existing layer mask. Just use the Brush Tool set to black or white (or any shade in between) to adjust the layer mask. Alspo remember that you can adjust the brush settings as well.

Hey there. Thanks for the infos. I see.
But I saw in a tutorial the possibility to show the Quick Mask on the picture. It does become handy in some situations. How come I can't manage to do so ?
If I do "Q" on a layer, I get the red in my Layers panel but not in the image.

Screen Shot 2018-11-14 at 20.22.11.jpg
 

IamSam

Administrator
Staff member
Administrator
Messages
22,721
Likes
13,258
If I do "Q" on a layer, I get the red in my Layers panel but not in the image.
Yes.....that's how it works. You now need to apply the mask using the Brush Tool.

The pink color will only appear on the canvas if you have made an active selection and then hit the Q key.
 

Top