What's new
Photoshop Gurus Forum

Welcome to Photoshop Gurus forum. Register a free account today to become a member! It's completely free. Once signed in, you'll enjoy an ad-free experience and be able to participate on this site by adding your own topics and posts, as well as connect with other members through your own private inbox!

Ruler Display


NYPhoto

Member
Messages
7
Likes
0
Hi,

I scanned some old 4x4 photos, that I would like to print as 4x4 on 4x6 paper. I read where I could change the canvas size in Photoshop to 4x6 to get this done.

When I look at the the 4x4 scanned photo in Photoshop, the ruler displays it 80x80. How can I get the actual inches on the ruler displayed? I am not too interested in the actual size of the photo displayed, as long as the real size in inches is displayed.

Thanks!
NYP.
 

NYPhoto

Member
Messages
7
Likes
0
The ruler is set to inches, and it displays at approx 80x80. The photos were scanned at 300 dpi.I am using PhotoShop 7.0

Let me know if you need any other info to help out.

Thanks again!
NYP.
 

Tom Mann

Guru
Messages
7,223
Likes
4,343
At this point, probably the quickest way to get to the bottom of this is if you post the image file in this thread so that we can inspect it.

Cheers,

Tom M
 

NYPhoto

Member
Messages
7
Likes
0
Well, there are several images, and mostly family photos. I scanned a new one today just to use for this thread. It is a 4x4 scanned at 300 dpi using a Canon scanner with Photo Studio 5.5.
However, the ruler did not display as 80x80 but about 14x14. Still the same question though - how come the ruler is not the actual inches. I also included a screen print of the file in PhotoShop.

Actually, now that I look at them again, it seems like the ones I scanned from the photo display about 14x14 and the ones I scanned from the negatives are 80x80.

Thanks.
NYP.
TestSealApr70.jpgTestSealApr70_PS.JPG
 

Tom Mann

Guru
Messages
7,223
Likes
4,343
As I suspected in an earlier post, the number of pixels per inch (ppi) has been changed from what you thought it was (ie, 300 ppi) to 72 ppi. This caused the estimated size in physical units (ie, not pixels) to increase to ~14 inches. To see this, I simply opened your file in Bridge. Below is the screen grab.

File_data_from_Adobe_Bridge_showing_wrong_nr_inches.jpg

Now, if I change the ppi from 72 back up to what it should be, 300 ppi, then the size in real world units goes back down to around 3.5 inches. Below is the screen grab from PS.

Size_in_inches_at_300ppi.jpg

This change in ppi could have occurred in any of several places, so I can't be sure where this happened. It could have been that the scanner didn't remember your settings correctly ... it could have been that if you brought the image into PS through ACR, the settings at the bottom of the ACR page were incorrect ... or, it could have happened within PS itself. If you want some help in figuring this out, you have to provide a blow-by-blow account of everything you did from the point of turning the scanner on to the point of producing the jpg that you posted.

HTH,

Tom M
 

NYPhoto

Member
Messages
7
Likes
0
Thanks - that's interesting. How do I change the ppi?
Well, lets' see. I turn the scanner on, I start ArcSoft, I put the photo in the scanner, I click on the scanner icon within Arcsoft, I click Preview, I select the scanning area, and I hit scan. The scann windown closes, and the result photo remains which I save as a .jpg with file name and location. I close the file.... I probably close ArcSoft in most cases, I open Photoshop, and I drag the photo into Photoshop from Windows Explorer.

I did notice on the Advanced tab from the Scanner screen in ArcSoft that is an "Output Size" option with a pull down menu. I have not noticed it before, and have not made changes to it. It is set to "Flexible". Some of the options from that pull down menu are: L Landscape, L Portrait, and pixel options like 128x128, 640x480, 800x600... etc.

Thanks.
NYP.
 

Tom Mann

Guru
Messages
7,223
Likes
4,343
1) Which Arcsoft product are you using. They have many. Pick one from the list on their website:
http://www.arcsoft.com/index.html
Neither you nor I can look up things like, "how to change the resolution", in the user manual without knowing which user manual to refer to.

2) I wouldn't select "flexible". That option sounds like you are turning control of the process over to some unknown software developer who doesn't have a clue as to what YOU really need. My suggestion is to always use the largest pixel size option listed in the menu, and then, if you really want to make a smaller copy at some later time, it's trivial to do in PS. The only downside to this approach is that each scan may take a bit longer, but the flip side of this is that you will never have to re-scan any document / artwork. I strongly suggest you do this on any scan you do yourself, or have someone do for you. If you do this, in addition, you'll never have uncertainty about document dimensions again.

3) An image can be brought into Photoshop in one of two ways: (a) directly; (b) through ACR. If you happen to be using (b), at the bottom of the ACR screen, there will be a line of information that looks like a URL link (ie, blue, underlined, etc.). If you click on it, you will see various ACR options, including size of the document (in pixels). This is another place that your document could have changed pixel dimensions without you being aware of the change. If you are using ACR, make sure these options are also set to preserve pixel dimensions, not down rez your image before it ever gets to PS.

My guess is that from the way your are describing the situation, the change occurred in the scanner settings, not in ACR (because most people don't use ACR to bring JPGs into PS).

HTH,

Tom M

PS - What made you think that the original PPI was 300? Did you ever look at the properties of the file (in Windows file explorer) before you took it into PS, or did you think it was 300 ppi for some other reason?
 

NYPhoto

Member
Messages
7
Likes
0
Hi,

1) I am using Photo Studio 5.5
2) I tried playing around with the output size options, and it looks like if it is not set to Flexible, that it will not let me select the size myself. In other words, if I set it to Portrait, I cannot expand the selected area to landscape. If I choose 2592x1994 it gives me a landscape selection with those dimensions. I'll try to send a good screen print of what this looks like.
3) Hmm, I don't see the ppi at the bottom of the Arc Soft Photo Studio screen.

I think I am scanning at 300 dpi because that is what I choose for resolution PhotoStudio2.JPGPhotoStudio3.JPGwhen I do the scan. The screen shot will show this.

Thanks again. Let me know what else I can provide.
NYP.
 

Tom Mann

Guru
Messages
7,223
Likes
4,343
Hi NYP -

Thanks for the additional info, screen shots, etc.

I spent a good half hour trying to track down the full user's manual to that software, being especially interested in the TWAIN-compliant scanning features and controls. Unfortunately, all I could find was either lists of the menu options, or quick start guides. I was not willing to try downloading what was promised to be the full version from some questionable websites, especially when you see that what they want you to download is an *.exe file, not a pdf or word document!!!

Without a manual, there is just no way to know for sure exactly their user interface works, but I can make a good guess.

It appears to me that the software estimates the horizontal and vertical dimensions (in inches)of the object being scanned during the pre-scan phase. It then transfers these numbers to both the "source" and the "output settings" sections of the user interface (UI), along with the default ppi/dpi setting of 300 ppi.

Based on the example you showed, when you do the math (ie, 3.33" x 300 ppi, and 3.60" x 300 ppi), you come out with numbers very close to the pixel dimensions of the first file you posted. So, up to this point, everything looks great. The question then is why is why in the world is the ppi value in Photoshop or Bridge for this file appear to be only 72 ppi, not the 300 that either you entered, or was the default for the scanner?!?!?!!!

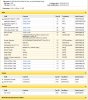
So, I double checked the contents of the file using two additional EXIF data viewers. They both came to the same conclusion: Your Photo Studio software appears to have simply neglected to write ANY value for the ppi value in the file, so when Bridge (the first viewer that I used) or ACR or PS itself opened the file, it needed some number for the ppi value, so it used the default value of 72 ppi and this error (72 instead of 300 ppi) made the rulers display the dimensions in inches incorrectly.

The fix is simple: In Photoshop, (a) go to the Image / image size dialog box; (b) make sure the "resample" option is NOT checked; (c) type in "300" (or whatever value you used when scanning) in the ppi field; (d) hit "OK", and the rulers should jump to display the correct values.

This is exactly what I did when, in Post #7, I said, "...Now, if I change the ppi from 72 back up to what it should be, 300 ppi, then the size in real world units goes back down to around 3.5 inches. Below is the screen grab from PS...".

Problem solved. :)


HTH,

Tom M
 

Attachments

  • Hidden_JPG_data-image1.jpg
    Hidden_JPG_data-image1.jpg
    533.6 KB · Views: 0
  • Hidden_data-image1-fm_EXIF_tool_gui.jpg
    Hidden_data-image1-fm_EXIF_tool_gui.jpg
    370.1 KB · Views: 0

NYPhoto

Member
Messages
7
Likes
0
First off, thanks for spending 1/2 hour trying to find the manual - and of course for all the other time spent on this. The fix you recommended worked, and I now see the correct size of the photo. I don't quite understand your screen prints, but that is probably because I have an older version of PS.I don't remember if the manual came with the scanner. If I happen to find it, what would I look up? Or is it irrelevant at this point since you found the solution?

Thanks again!
NYP.
 

Tom Mann

Guru
Messages
7,223
Likes
4,343
Hi NYP - You are quite welcome. No problem about the time - I like a good challenge every once in a while, LOL.

FWIW, the screen shots that I included in my most recent post were actually not from Photoshop, but from two different, fairly obscure utility programs that are designed to display metadata contained in image files that most users aren't even aware exists (eg, EXIF, IPTC, XMP, etc.). It can be used by archivists, forensic people, and just to get to the bottom of issues such as you were having.

I'm glad the fix I suggested worked for you.

WRT the user manual, originally, I went hunting for it to establish unambiguously what was going on without having to rely on an educated guess. Fortunately, my guesswork proved to be ok.

At this point, the one thing the manual would be useful for is to tell us if there might be a setting somewhere in the UI to toggle on and off writing the PPI setting (and other metadata) to the file so that downstream software doesn't have to put in its own default values for values that should already exist in the file.

Issues like this are NBD when one is only dealing with small numbers of files, say, less than a couple of dozen shots per day, because the data can be added manually. However if you were dealing with a couple thousand shots from a single wedding, having such data be missing would be a royal PITA, and no professional level scanning program would ever omit something this important / useful.

Glad to have helped. Don't hesitate to drop back in if you have any other questions.

Best regards,

Tom M
 
Last edited:

Top