What's new
Photoshop Gurus Forum

Welcome to Photoshop Gurus forum. Register a free account today to become a member! It's completely free. Once signed in, you'll enjoy an ad-free experience and be able to participate on this site by adding your own topics and posts, as well as connect with other members through your own private inbox!

Importing a person to be partly hidden and partly visible behind a tree


Paul P

New Member
Messages
4
Likes
0
Hello all,

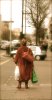
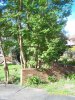
i have an image of a tree or shrub in Photoshop, and I would like to open an image of a person and import it into the tree image. The person would be behind the tree, so that some of the person would be visible where there are no leaves or branches, but some of the person would be hidden by branches and leaves as well. I can't figure out how to do this. Maybe it's simple (or not), but any help would be most appreciated.

Thanks in advance.

PS : running Photoshop CS on a Mac Pro with OS X 10.6.8.
 
Hi Paul P

Welcome to PhotoShop Gurus

If you upload the picture in question, it will easy to guide you trough the process, is far as i can understand, you will need to extract or isolate the tree on a on his transparent background, using extracting techniques, then also isolate the person in question, and only them position this person behind the tree, and at last add some sort of background on the composition to blend everything together, as i said before, whit an image to work whit, it will be easily explainable.
 
Hello,

thank you very much for your prompt reply.

here are the 2 photos. I am trying to place the lady behind the main tree, behind the lowe brick fence standing on the grass.
 

Attachments

  • lady.jpg
    lady.jpg
    412.2 KB · Views: 13
  • scene4lady.jpg
    scene4lady.jpg
    643.6 KB · Views: 11
Sorry,

in addition to my previous post, I know that the images are not good, and I know that they do not match up in terms of lighting and other things, but I am really just trying to get a handle of making things look correct in terms of spatial relationships, masking and so forth. So that the lady looks in the right position, with her form revealed and concealed by the branches and trunk correctly.

Thank you in advance.
 
This is a massive undertaking, for anyone at any skill level.
If your after a learning curve in the art of layers/masks etc why not use a tut and try with images of better quality, and some what easier to attempt first off.
It can be done, but lots of effort would be required.
 
Hello Paul,

thanks for your reply.

One of the problems with being new to this is that one never knows when one has bitten off more than one can chew. The choice of particular images in my case was sort of arbitrary. If you can point me to some tutorials that show the principles of what i am trying to achieve, I'd be most appreciative.
 
Ok I think I have what you want to do get your woman create a mask lower her opacity down so you can see where banches come behind her etc. But also vary some layer blending modes you may find sometimes that will do most the work for you. this image had a very quick once over layer mask put on them the 1 on the left was normal blending mode the 1 on the right is set to darker colour yes you will need to tweak colour size etc.
scene4lady.jpg
 
I have selected the women and copied her on to a new layer. I have masked her where the main branches are and where some of the foliage is. It makes this step easier if you lower the opacity on the women to where you can see the branches through her, then just paint the mask to reflect what branches you want to see. You don't have to get all the branches to maintain the illusion that she is back there.
1.JPG
Next I selected the women, then on the background layer, copy the selected area of the women to a new layer. Shut of all layers but the new one and did a channels based selection to get the leaves.
2.JPG
keep in mind that this will just reveal the areas that I left out in the previous layer.
This layer when the mask is applied looks like this.
3.jpg
These 3 layers together
5.JPG
Then I did a layer to dodge and burn to make lighting a little better.
Final result.
4.jpg
Total time w/trial and error about 30 minutes.
 

Back
Top