What's new
Photoshop Gurus Forum

Welcome to Photoshop Gurus forum. Register a free account today to become a member! It's completely free. Once signed in, you'll enjoy an ad-free experience and be able to participate on this site by adding your own topics and posts, as well as connect with other members through your own private inbox!

Method for Creating a Grid of Squares to Later Fill in Color


dan.abner99

Member
Messages
6
Likes
0
Hi all,

I am new to Photoshop, however, I was hoping to use it to plan and visualize some mosaic tile projects before getting started with the physical medium. Therefore, I am looking for a method to:

1) Create a grid (usually of squares, sometimes rectangles or triangles) to overlap on a blank document of varying heights and lengths. There could be anywhere from 50 to 100 squares needed across the length and height separately.

2) Easily be able to fill in color to each square separately with one click.

3) Because the grid will actually represent the grout in the mosaic, ideally I would be able to change the grid line widths and color.

I have read many posts and blogs and watched many videos. I was able to follow the instructions in this video to create the grid relatively easily, however, the grid squares do NOT fill in as expected using the paint bucket tool:
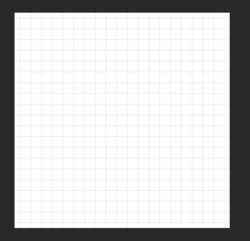

Photoshop1.png

I watched another video where video where the person used the rectangle tool to draw a separate square within the grid. I am hoping that there is a one-click method of assigning colors to each square. Any assistance is appreciated.
 

ph_o_e_n_ix

Well-Known Member
Messages
119
Likes
138
Does this help?

Mod edit: This is an executable file.
 

Attachments

  • Grid Generator.zip
    4.8 KB · Views: 24

IamSam

Administrator
Staff member
Administrator
Messages
22,721
Likes
13,258
Hello and welcome!

No matter what method you choose to create the grid, unless a script does it for you, you will still have to make a selection of the individual cells in order to fill with color. There really isn't a "one click method". At the very least it could be two clicks, one to select (cell or grid) and one to fill.
 

ph_o_e_n_ix

Well-Known Member
Messages
119
Likes
138
Using my script and with the right settings of the paint bucket tool (I believe "contiguos" and "all layers" has to be checked), the individual cells can also be filled with one click.
 

IamSam

Administrator
Staff member
Administrator
Messages
22,721
Likes
13,258
With the right settings of the paint bucket tool (I believe "contiguos" and "all layers" has to be checked), the individual cells can also be filled with one click.
Yes, this is correct..........(depending on how the grid was created) as long as you select all cells and give them a solid color.

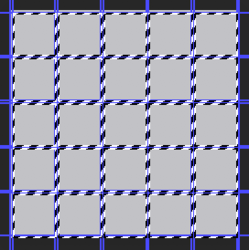
All cells need to be selected first.
Screen Shot 2020-02-10 at 12.59.26 PM.png

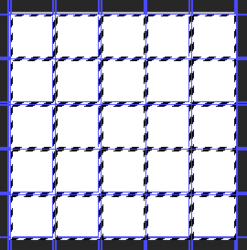
On a blank layer, add a color to the cells, in this case white....
(note: in this example, I left the selection on but it can be turned off after filling)
Screen Shot 2020-02-10 at 12.56.10 PM.png

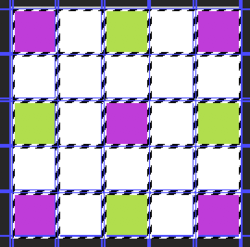
Now you can fill the individual cells using the Paint Bucket Tool and one click.
This is a three+ step process that leads up to being able to add "one click" color to the cells.
(note: in this example, I left the selection on but it can be turned off after filling)
Screen Shot 2020-02-10 at 12.57.59 PM.png
 

ph_o_e_n_ix

Well-Known Member
Messages
119
Likes
138
It's not necessasary to select the sells first...

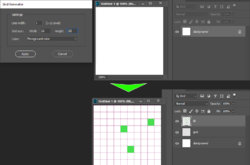
If you have applied my script, you can see, that the paint bucket tool was already selected, a new layer called "fill" was added on top of the grid layer, so you can fill the cells directy (if you have you color already choosen and your settings of the paint bucket tool are the right one).

The grid below limits the cells to be filled.
 

IamSam

Administrator
Staff member
Administrator
Messages
22,721
Likes
13,258
@ph_o_e_n_ix - Can you post screenshots and explanations of how and what your script does? This may be exactly what the OP is looking for.

Note: I have a habit of NEVER opening an executable file from this forum (or any forum). This isn't a trust issue, it's just a personal policy. So I have not opened your script.....sorry!
 

dan.abner99

Member
Messages
6
Likes
0
@IamSam: Thanks for the response. I have not looked at ph_o_e_n_ix's script yet: My question to you is: Let's say I have a 50 x 100 grid. Then, there are 5,000 cells total. How does one select all 5,000 cells in an efficient way? Can multiple cells be selected in groups or batches?
 

dan.abner99

Member
Messages
6
Likes
0
@ph_o_e_nix: I am exploring your script now. So far, it is working out perfectly. Many thanks. I may be in touch if I have any questions.
 

thebestcpu

Guru
Messages
2,988
Likes
2,747
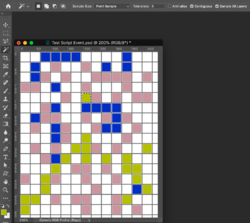
Well, there is a way to both select and fill at the same time yet it may not be everyone's cup of tea or for the faint of heart.

This can be achieved by using the capability under File > Scripts > Script Event Manager along with a very simple Action

1) Create an Action that all it does is a Fill command using Foreground using Cmd +Opt keyboard shortcut (Cntrl + Alt for PCs) Remember where you park your Action :)

2) File > Scripts > Script Event Manager
--- Click on the checkbox in upper left corner labeled "Enable Events to Run Scripts/Actions"
--- Click on the dropdown box "Photoshop Event" and select the option "Add an Event"
---- Fill out the dialog box. The upper box is just a descriptor name (you can name it anything) the second box must be set to lower case "setd" without the quotes as shown. This is the event for a simple selection (not add to, subtract from, exclusive or select)

Screen Shot 2020-02-10 at 3.13.21 PM.png

------Click OK
------ Back in the original dialog box click the check box to run an Action and select the Action Set and Action you created in #1 above. I filled in where mine was located
------ CRITICAL CRITICAL CRITICAL after doing these steps you need to click on the "Add" button to have this event activated

Screen Shot 2020-02-10 at 3.13.52 PM.png


3) I will assume you have already set the grid and a Layer above for the fill action you need
4) Select the Magic Wand Tool with a simple select mode, contiguous, and sample all Layers. I used "Point Sample" and tolerance of 8 yet this depends on the background color of your grid. Setting Anti-Alias is optional
5) Select desired foreground color from the foreground color chip in the toolbox
6) Click in the middle of the grid area you want filled and the grid square will be automatically filled with the foreground color. Keep picking square to fill. You can change the foreground color and click grid cells with the new color
7) When done, go back into Files >Scripts >Scripts Event Manager and turn off the event by unclicking the checkbox in upper left corner (you will regret it if you don't do this last step)

Here is a simple grid that I filled one click at a time and changing foreground color as I went along:

Screen Shot 2020-02-10 at 3.15.04 PM.png

NOTE: This event is also triggered by some other actions such as deleting a selection so the downside of this approach is the overhead of turning it on and off and not doing other Photoshop work in the meantime. I believe the Event Handling could also be turned on and off with a simple Action if that is helpful.

Just another way to consider and hope this helps
John Wheeler
 

IamSam

Administrator
Staff member
Administrator
Messages
22,721
Likes
13,258
My question to you is: Let's say I have a 50 x 100 grid. Then, there are 5,000 cells total. How does one select all 5,000 cells in an efficient way?
This would depend on how the grid is constructed.............it could be a one click command (Cmd/Cntrl + Thumbnail Click on grid layer).

For now................you need to work with @ph_o_e_n_ix 's script. That seems like it's the best solution for you!
 

ph_o_e_n_ix

Well-Known Member
Messages
119
Likes
138
@ph_o_e_n_ix - Can you post screenshots and explanations of how and what your script does? This may be exactly what the OP is looking for.
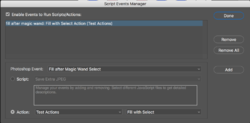
Sure...
screenshot.jpg

Note: I have a habit of NEVER opening an executable file from this forum (or any forum). This isn't a trust issue, it's just a personal policy. So I have not opened your script.....sorry!
There are tools like sandbox/sandboxie for that ;)
 

dan.abner99

Member
Messages
6
Likes
0
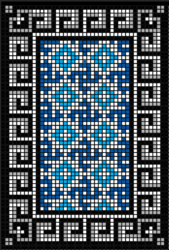
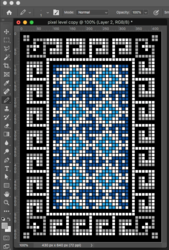
@ph_o_e_n_ix: I have been using your script and it has proven to be very helpful. However, if I have a few follow-up questions. This is one of my prelim designs:

1581441055621.png

1) Now that I have the general design, I would like to experiment with changing colors. Is there a quick and easy way to change colors wholesale? For example, I would like to experiment with changing ALL black cells to a different color. Is that possible without changing each cell individually?

2) I know I made a BIG deal about choosing the color of each cell separately and OFTEN that is necessary. HOWEVER, you can see that I often will color whole rows or columns one particular color (Think the outside black order in the image above). Is there a way to quickly color a selection or group of cells, like all or most of a row or column?

Once again, many, many thanks!
 

thebestcpu

Guru
Messages
2,988
Likes
2,747
Hi dan

Lots of good posts with the scripts and I am learning too.

I just thought of another way to consider. This really only works well if your grid has square cells thought (does not cover all your needs)

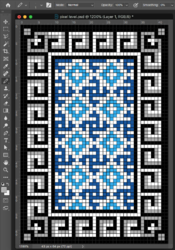
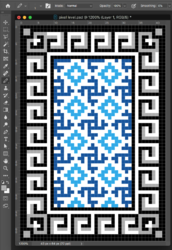
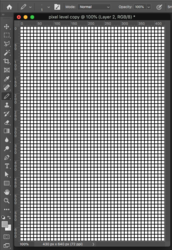
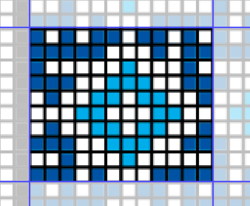
1) Make each cell in your grid a single pixel. Under menu item "View" you turn on the pixel grid. I created your example and it looks as below as a 43 x 64 pixel total size. Note that you can draw with the pencil at a pixel level with no selection required. Also, selecting subsets of individual cells is quite easy and a number of ways of doing so. Also, if you are using the exact same color in all the like cells, they can all be easily selected and color changed with the magic wand and a Fill command

Screen Shot 2020-02-11 at 2.33.31 PM.png


Here is what is looks like without the pixel grid turned on:

Screen Shot 2020-02-11 at 2.33.51 PM.png


2) You might say great yet that is not the size I want or need and also I need cell borders put in. No problem

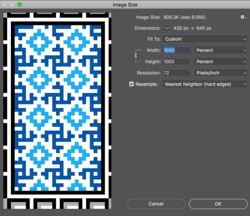
Use Image > Image Size and increase size by an integer size (I suggest some multiple of 1000%) and set the rendering algorithm to Nearest Neighbor. This does an excellent job of upsizing grid type patters. The Image Resize panel is shown below:

Screen Shot 2020-02-11 at 2.35.19 PM.png


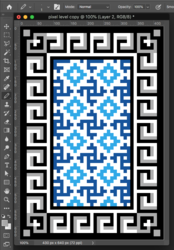
And here is the result after a 1000% size increase up to 430 x 640 pixels:

Screen Shot 2020-02-11 at 2.45.58 PM.png

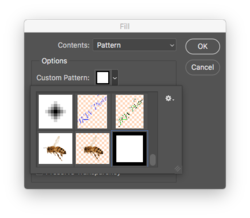
For the grid, I created another Layer and did a pattern fill with a pattern that was 10 x 10 pixels with black border and solid white interior show in lower right corner of the Fill Panel.

Screen Shot 2020-02-11 at 2.39.41 PM.png

That creates a pixel grid per the image below:

Screen Shot 2020-02-11 at 2.46.21 PM.png

Changing the above grid color would be easy again with selection by magic wand.
By making this grid Layer set to Blend of Darken, you get the final result below (grid street is 2 pixels side)

Screen Shot 2020-02-11 at 2.46.38 PM.png

Note that the tone appears to be darker yet that is just the effect of having an adjacent dark grid.

Just another way to consider to get the job done.
John Wheeler
 

thebestcpu

Guru
Messages
2,988
Likes
2,747
@thebestcpu: Wow! This looks like a very viable option that obviates the issues I was having. I am trying it out now. Thanks John!
You're welcome. It does has its limits. Once you have made the pixel pattern your want, you might want to create a duplicate with Image > Duplicate and upsize the duplicate. Reason being is that all edits need to be done on the pixel level and once upsized, all those pixel tricks go away. So keep the original pixel level image, make changes from it, duplicate, then upsize the duplicate.

Lots of ways to make the grid you want. There is more flexibility if you upsize to a much larger image so the street size of the gird is larger than two pixels yet it all depends on what you want.
Hope it helps
John Wheeler
 

IamSam

Administrator
Staff member
Administrator
Messages
22,721
Likes
13,258
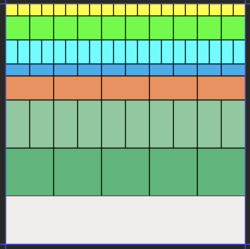
I see that tile patterns are repetitive. You can set up one section and then copy/move it.
Screen Shot 2020-02-12 at 5.31.52 PM.png

I realize that what I'm about to show is what may be considered an advanced technique. It's not a "one click" fix, but once the basic foundation is established, it is just a simple copy and move. The beauty of it is that it's completely editable!!!

It's based on the "sync" or "cloning" of smart objects. The principle is that once you create a shape, you can convert that shape layer into a smart object. This layer will serve as an "original" and then clones are made through copying. You can have as many clones as you wish. If you want to edit the clones, just double click the original and edit, then save changes, all the clones will update.

I was very interested in the tile and tile patterns. So I started researching. I noticed that tile patterns are certainly not limited to exact grids. As long as all the tiles are a evenly spaced in "even" pixels, then it should not be a problem. The only issue was the gutter/grout line width. This is solved with a stroke added to the "original" tile layer. If you need a 4 pixel gutter, just add a 2 pixel inner stroke to each tile. When two tiles marry, they form a 4 pixel gutter/grout line. This would be editable anytime you wished to change the width and color.

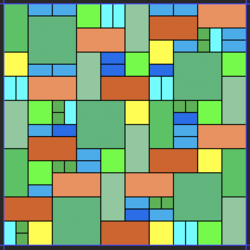
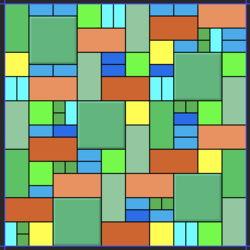
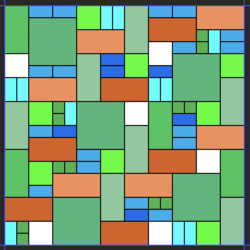
These are squares and rectangles in a 1000 x 1000 canvas. Theoretically, you can have anything from a 1px square/rectangle to a 1000px square/rectangle!
Imagine the possibilities!!!
Screen Shot 2020-02-12 at 3.15.37 PM.png

The combos are endless!
Screen Shot 2020-02-12 at 5.24.43 PM.png

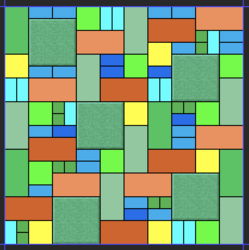
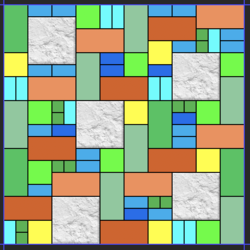
Here I have quickly added a bevel & emboss layer style to the big green squares.
Screen Shot 2020-02-12 at 5.02.58 PM.png

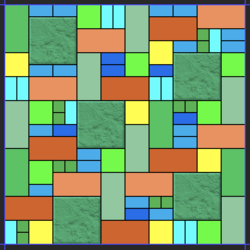
How about texture as well! These changes/edits can be made to any and all of the tiles just by updating the "original" shape layer!
Screen Shot 2020-02-12 at 5.03.57 PM.png
Screen Shot 2020-02-12 at 5.59.03 PM.png

Real stone texture...
Screen Shot 2020-02-12 at 5.57.33 PM.png

Don't like the yellow tiles..............change them all quickly.
Screen Shot 2020-02-12 at 5.29.37 PM.png

Works on triangles and polygons. (The polygons would require some filler triangles)
Screen Shot 2020-02-12 at 5.35.24 PM.png

I have to admit that this was a huge pain to set up, but once I had all my "original" shape/tile layers established, the actual design went very fast. The Move Tool with the auto select on was the best way to select shape clones and Cmd/Cntrl + J to copy/duplicate, then move where I wanted it.

This is just an option for you to consider in the future.............it's not really for Ps newbys!
 

Top