Photoshop Gurus Forum
Welcome to Photoshop Gurus forum. Register a free account today to become a member! It's completely free. Once signed in, you'll enjoy an ad-free experience and be able to participate on this site by adding your own topics and posts, as well as connect with other members through your own private inbox!
You are using an out of date browser. It may not display this or other websites correctly.
You should upgrade or use an alternative browser.
You should upgrade or use an alternative browser.
Cropping and adding a border along with text to a photo
thebestcpu
Guru
- Messages
- 3,211
- Likes
- 2,960
Hi @Rolo Polo
Your request should be posted to the General Photoshop Board Forum. The Free Photoshop Requests forum is where you request changes and forum members do all the work for you.
John Wheeler
f
Your request should be posted to the General Photoshop Board Forum. The Free Photoshop Requests forum is where you request changes and forum members do all the work for you.
John Wheeler
f
thebestcpu
Guru
- Messages
- 3,211
- Likes
- 2,960
Hi @Rolo Polo
Here is another approach to consider.
Using the crop tool set the Options Bar to ratio of 5w x 3.5 H as shown it should appear as:
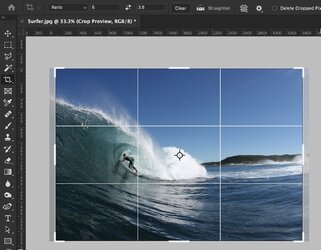
The stretch the upper left and upper right corners until it includes the whole image with some blank area at the top e.g.:
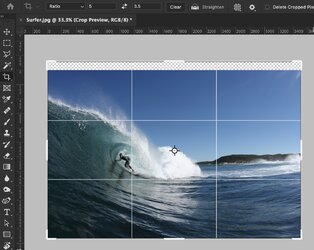
Accept the new cropping, select the new blank areas with a few pixels of overlap into the image and use the Edit > Content Aware Fill command to fill out the reset of the image.
From there, for borders, you can again use the crop tool (with the option set to unconstrained) and you can expand any side of the image any amount you want and fill it as you please.
Just another approach to consider and hope this helps
John Wheeler
Here is another approach to consider.
Using the crop tool set the Options Bar to ratio of 5w x 3.5 H as shown it should appear as:

The stretch the upper left and upper right corners until it includes the whole image with some blank area at the top e.g.:

Accept the new cropping, select the new blank areas with a few pixels of overlap into the image and use the Edit > Content Aware Fill command to fill out the reset of the image.
From there, for borders, you can again use the crop tool (with the option set to unconstrained) and you can expand any side of the image any amount you want and fill it as you please.
Just another approach to consider and hope this helps
John Wheeler
- Messages
- 23,889
- Likes
- 13,633
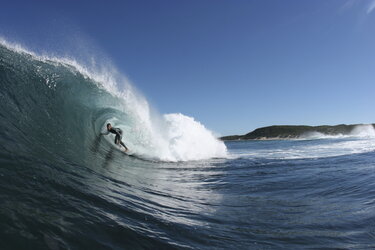
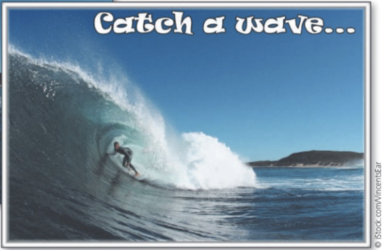
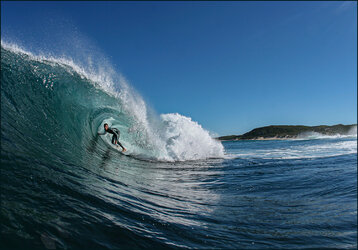
Please see the original post. A new image was added.how do you crop this surfer photo to match the size of a postcard that is three and a half inches high and five inches long?
how to add a shaded border along with text to a photo?
- Messages
- 23,889
- Likes
- 13,633
Did these tips help you with creating the border? If at all possible, I would like to see how you created the border!Okay, Thank you for these helpful tips.
Since you have requested how to do two tasks and you got assistance - it would be great if you can show your work on how well you could implement. If any improvements can be made, we can assist you.Yes, can you show me?
Also, please make an attempt with the border using instructions below and show the result so guidance can be provided. Just ask if you have any questions.
One approach to create borders:
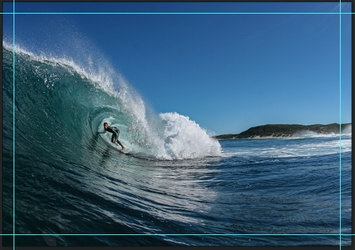
1) Create Guidelines so that it becomes easy to create border. After looking at the picture, 50 pixels from each side seemed to be a good border width, so we will create guidelines on all four sides.
a) Go to View > Guides > New Guide... then click "Vertical" and set Position to 50 Pixels.
b) Same as above, click "Vertical" and set Position to 1450 Pixels.
c) Same as above, click "Horizontal" and set Position to 50 Pixels.
d) Same as above, click "Horizontal" and set Position to 1000 Pixels.
Now, you should have your guides setup like this:
2) Select Brush tool, Set Brush Colour to White, Size to 20 Pixels, Hardness to 20%. This gives a dissolving look on the edges.
3) We do not need the Guides anymore. Go to View > Guides > Clear Guides to remove them.
4) Select a new layer. We are going to draw our border on that layer. So name this layer "Border".
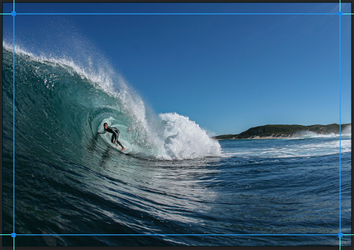
5) Select Pen tool, click on the four intersections of the guidelines. Your screen should look something like this:
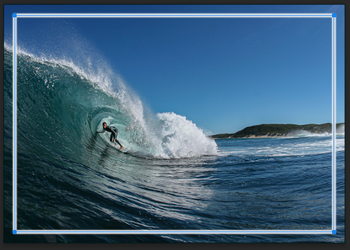
6) Right click, Select "Stroke Path", Set Tool to Brush, ensure Simulate Pressure is turned off and select Ok. Your screen might look like this:
7) Under the Layer Stack window, you will see the Blending Options button as shown in Red circle below:
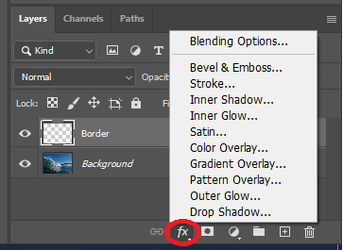
Select that and select "Bevel & Emboss..."
8) The options I selected and the final result are shown in the below image. You can choose your own options to suit your liking.
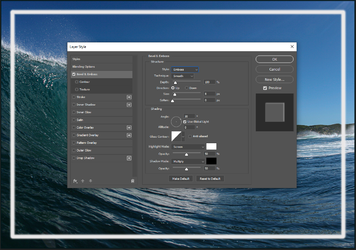
Note: I think Pillow Emboss might be closer to the border you requested for. Experiment with the settings until satisfaction.
Share your result.
- Messages
- 23,889
- Likes
- 13,633
Sorry.........this thread veered off track!
Please see this thread: https://www.photoshopgurus.com/forum/threads/how-to-make-a-cut-at-exactly-45-degrees.76916/
Please see this thread: https://www.photoshopgurus.com/forum/threads/how-to-make-a-cut-at-exactly-45-degrees.76916/

