What's new
Photoshop Gurus Forum

Welcome to Photoshop Gurus forum. Register a free account today to become a member! It's completely free. Once signed in, you'll enjoy an ad-free experience and be able to participate on this site by adding your own topics and posts, as well as connect with other members through your own private inbox!

Dirty look when I erased the background?


Gerardo

Active Member
Messages
36
Likes
10
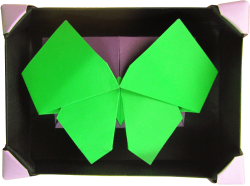
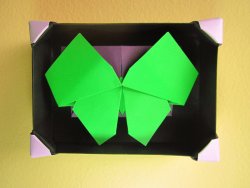
I'm using Photoshop CS6. I used the background eraser tool, well... to remove the background. It's a picture of a hanging decoration and I simply removed the wall. I saved the file as a PNG and opened it on Microsoft Publisher. Now there's something like grayish "dirt" where the wall used to be. What did I do wrong? What do I have to do? I'm attaching the PSD file.

Thank you in advance.
 

Attachments

  • Butterfly and canvas - no background.psd
    6.6 MB · Views: 10

IamSam

Administrator
Staff member
Administrator
Messages
22,765
Likes
13,269
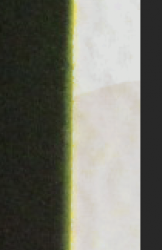
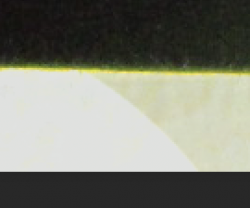
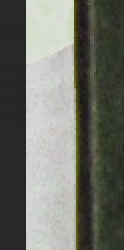
There's is still background left in the image. It was not removed.
Screen Shot 2020-12-17 at 8.39.01 AM.png
Screen Shot 2020-12-17 at 8.39.07 AM.png
Screen Shot 2020-12-17 at 8.39.12 AM.png

What was your settings (Tolerance) on the Background Erasure Tool?

There are much better ways to remove backgrounds.
 

IamSam

Administrator
Staff member
Administrator
Messages
22,765
Likes
13,269
So that we can help you by example, please post the original image before you attempted to remove the background.
 

JeffK

Guru
Messages
2,497
Likes
2,898
I'm not the most technically superior on this forum - but I took a try at it. I'm using a later version but I saw the "dirty look" when I placed a solid fill white layer underneath. I thought it might be a tolerance issue but when I raised the tolerance high enough to erase that background, it started to affect the rest of the shot.
So my next question was - why not use the pen tool? It just might be that the chosen tool can't do the exact job you want. But PS always has other tools you can use to get where you want to go.
Here is a png file I took from your PS file using the pen tool, creating a selection, and then select and mask:

capa test.png
As Bruce Lee once said after knocking out a boxer with a right hook and asked why he didn't use karate - "I use what works." ;)

- Jeff
 

Gerardo

Active Member
Messages
36
Likes
10
Thank you both. There are so many tools I don't know now about in PhotoShop. I just chose that one intuitively. I've attached the original picture.

Is the pen tool the easiest and most effective one for this job? I've never used it.

Mariposa y lienzo 1.jpg
 

JeffK

Guru
Messages
2,497
Likes
2,898
Thank you both. There are so many tools I don't know now about in PhotoShop. I just chose that one intuitively. I've attached the original picture.
Is the pen tool the easiest and most effective one for this job? I've never used it.

You didn't choose the "wrong" tool. The eraser works in a lot of circumstances - although I prefer to use masking since it's non-destructive. If you make a mistake with the eraser tool, you have to start all over again since you can't bring back that erased section. At least with a mask, you can easily bring back or add to the selection with a brush.
I'm not familiar with CS6 - admittedly I'm using a later version. I hated the pen tool when I first tried to use it. H-a-t-e-d i-t. All those branches and handles to manipulate. But the newer version added a curvature pen to get around corners so I use it more often. The advantage of the pen tool is if you have simple shapes, it will give you a relatively quick, sharp, and clean selections.
In CS 6 there's a pen tool but there is a learning curve. You also have the lasso tool, the quick selection tool, and others that will help. Try those as well. PS is a huge program that gives you lots of choices to do the same thing. Just have to use the one that works best.
Someone else may jump in with more background in the earlier version.
One more quote - after being asked how he felt about failing 1,000 time to create the light bulb , Edison said,, "I didn't fail - I just found 1,000 ways that didn't work."
Or something like that. :cheesygrin:
- Jeff
 

thebestcpu

Guru
Messages
2,995
Likes
2,762
Hi @Gerardo
Lots of ways to get the job done. The pen tool is the most accurate yet takes some practice. Which tool is fastest/best depends on the image.
Here is one tool that can work when you have relatively consistent colors for the part of the image you want to keep or mask out. That is using the quick selection tool (its paired with the magic wand tool in the tool pallete).

First image shows selecting the Quick Selection Tool and I am starting to select around the outside boundary of your image.
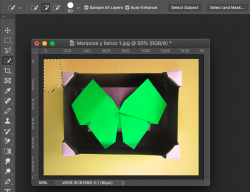
Screen Shot 2020-12-17 at 9.08.51 AM.png

This second image shows what the selection looks like when I have gone around the entire edge. Note that it also picked up the white/grayish corners (don't worry).
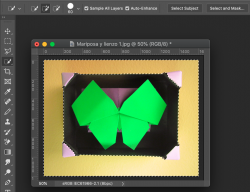
Screen Shot 2020-12-17 at 9.09.18 AM.png

Using the same tool, with the Opt key pressed (Alt key on PCs) the Quick Selection tool changes to subtract and I go and select each of the four corners so the until the marching ants are exactly containing what I want as in the picture below:
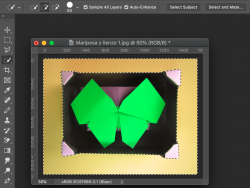
Screen Shot 2020-12-17 at 9.09.53 AM.png


There are a couple ways you could go at this point.
1) Make sure your Layer is not a background Layer in the Layer panel (if it has the lock symbol it is a background Layer). If it is a background Layer convert it to a normal Layer (ask if you need help with that). After this just hit the delete key and the outside background is gone.

2) What I usually do though is instead o deleting the background (gone or good), I prefer to create a Layer Mask. So I first invert the selection with the Keyborad shortcut Shift+Cmd+"I" (Shift + Cntl + "I" on PCs) shown in image below
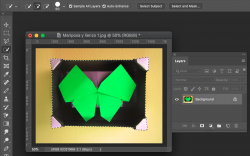
Screen Shot 2020-12-17 at 9.10.28 AM.png


And then I convert the selection to a Layer Mask by clicking on the "Add Layer Mask" icon at the bottom of the Layers Panel (Rectnagle with black dot in middle). And you get the following image:
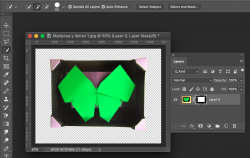
Screen Shot 2020-12-17 at 9.10.49 AM.png

I prefer this approach as I can more easily modify what is erased by modifying the Layer Mask (won't cover that here).
Hope this gives you some extra ideas on a direction to take. There is no one right answer as it depends on the image, you skill level with Photoshop and tradeoffs on accuracy and speed depending on the tool used.
John Wheeler
 

JeffK

Guru
Messages
2,497
Likes
2,898
@Gerardo - just happened to stumble across a Photoshop Essentials CS6 training course on Lynda.com. It's hosted by Julieanne Kost:


Lynda.com is a great resource although it's not free. I happen to get it at no cost thru my local library. There's also a button at the bottom of the page that you can get a free month of Lynda.com thru LinkedIn.

Although not geared to CS6, Aaron Nace of PHLearn also has a great essentials training course at no cost:


Both offer practice files to work with while watching the videos.

Enjoy!

- Jeff
 

Top