What's new
Photoshop Gurus Forum

Welcome to Photoshop Gurus forum. Register a free account today to become a member! It's completely free. Once signed in, you'll enjoy an ad-free experience and be able to participate on this site by adding your own topics and posts, as well as connect with other members through your own private inbox!

change color in CS4 after placed image


chelmarsie

Member
Messages
6
Likes
0
Hello. I have a stock photo of a lizard I have through stock.adobe.com that I downloaded (so I have permission to use this). I just want to change the color from black to green (simple right?). I have been searching for this for over 3 hours. I actually DID do this 3 hours ago...BY CHANCE! and when I tried my best to go in and recreate it for some reason I just can't and I am so frustrated because it was so easy. I placed and resized my image and hit checkmark. Then double clicked on Layer on right hand side. Checked off Color Overlay and OK and it comes up Red. Then double clicked color box under COLOR column and I thought I hit the color green and OK and it would make the lizard green and it didn't. I don't know what I am doing wrong (that I did RIGHT the first time) PLEASE HELP! I am trying to make our logo for our new business and cannot move forward until I make this. Thank you so much for your time. I KNOW this is easy since I happen to do it by chance earlier. I just cannot find a simple answer anywhere to this. Everywhere I look they tell me about Hue and Saturation and the tools to use for images but NOT a PLACED image that cannot be used by these tools (they are all grayed out). Thank you so much!!!Penne
 

MrToM

Guru
Messages
3,595
Likes
3,321
...I just want to change the color from black to green (simple right?)...
Couldn't possibly say....can't see the image in question.


...I thought I hit the color green and OK and it would make the lizard green and it didn't. I don't know what I am doing wrong...
Its probably a blending mode issue...try cycling through the blending modes, something may give you the result you desire.


...but NOT a PLACED image that cannot be used by these tools (they are all grayed out)...
If you use IMAGE > ADJUSTMENTS then no, but ANY adjustment can be applied by an adjustment LAYER. (I assume this is the method you have seen rather than via the menu.)

You have two choices here....either 'Rasterise' the layer and use the menu adjustments, (IMAGE > ADJUSTMENTS), OR use an adjustment layer.

You'll find the 'Create new fill or adjustment layer' icon at the bottom of the Layers Panel...4th from left.

If you cannot get anything to work then posting screen shots of the problem with relevant info visible, and / or posting the actual PSD file itself, along with an explanation of what it is you are trying to do may be more beneficial than trying to work out what you did before...there may be an easier alternative to get the result you want.

Regards.
MrToM.
 

chelmarsie

Member
Messages
6
Likes
0
MrToM. Thank you for the info. I have tried these. They do not work either. The image is an AI image only (not sure why stock photos from Adobe only come in AI, they should be available in PS as well). This makes it hard for those of us who only us PS (I do not know how to use AI as of yet, only ever learned PS CS4). I know this can be done quick and easy because I just did this hours ago by mistake with fooling around with it and not realizing what I was doing (and thought I could just re-create it right away) but for some reason could not remember what I did (SO FRUSTRATING at this point). I guess I just have to take hours tomorrow to keep plugging away at it til I get it again. I have posted this question to 4 adobe forums and this was the first forum that answered me so quickly (so grateful) but still frustrated as to not being able to figure this out :( Thanks again!
 

IamSam

Administrator
Staff member
Administrator
Messages
22,721
Likes
13,258
Please post the image or file or screenshots. It would make helping you 100 times easier.
 

Tom Mann

Guru
Messages
7,223
Likes
4,343
... (not sure why stock photos from Adobe only come in AI, they should be available in PS as well). This makes it hard for those of us who only us PS (I do not know how to use AI as of yet, only ever learned PS CS4). ...
While this observation doesn't answer your question, I have to point out that it is simply not true that stock images from Adobe are only available as AI files. Photos are usually made available as JPG files, but vector art (ie, "line art", "illustrations", etc.) are usually made available at *.AI or *.EPS files.

This can be easily seen by going to stock.adobe.com. Search on some theme such as "sunset beach" by typing these words into the search box at the top of the page, and then click on several photos that are presented to you. Look at the image properties info box that opens below each preview image. You will likely see a mixture of many different file types. My guess is that you accidentally downloaded, and then presumably purchased, a vector illustration.

However, this is no problem because Photoshop can easily import *.AI files.

As an example that you can work on, I downloaded this free vector file (in *.ai format):
http://www.freepik.com/free-vector/...713256.htm#term=illustrator&page=1&position=3

Unfortunately, I don't have the exact version of Photoshop that your are using available on my computer, so I used the oldest version of PS that I have easily available to me, PS CC 2014. The details might be slightly different between my version of PS and yours, but the general idea should be the same.

The first thing I did was to use file/open to open this AI file in PS. I left the import / conversion settings at their default values. It opened successfully, put the following image at the bottom of my layer stack, and named it, "Layer 1":

abstract background10-ps01a-01_orig_after_import_into_PS.jpg

First, let's turn this into something that hopefully looks something like your black lizard example. The easiest way to do this is to place a threshold adjustment layer above "Layer 1". After moving the threshold slider a bit to the right, the result is:
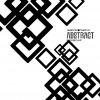
abstract background10-ps01a-02_converted_to_BW.jpg

OK ... I know it doesn't look like a bunch of black and white lizards, LOL, but at least it's black and white :).

There are many, many ways to change the black areas to green, as per your request. I'm sure other folks will join in and tell you their favorite method, but what I did was to add a "Levels" adjustment layer above the "Threshold" adjustment layer, and make the changes as shown in the attached screen grab:

levels_adjustment_layer.jpg

In other words, select the green channel and push the black slider in the lower left corner of the "levels" palette to the get the brightness of green that you like.

abstract background10-ps01a-03_changed_blacks_to_green.jpg

If you want to change the hue, eg, perhaps to a slightly blueish green, also select the blue channel and push the corresponding slider to the right for that channel, as well. Adjust to taste.

abstract background10-ps01a-04_changed_blacks_to_blue_green.jpg

HTH. If you have any questions, please feel free to ask.

Cheers,

Tom M

PS - If your black and white lizards differ from my black squares in some way other than just their shape (eg, maybe its really a continuous tone grayscale image, not a true black-and-white image, please upload the *.ai file that you are working with.
 
Last edited:

Top