What's new
Photoshop Gurus Forum

Welcome to Photoshop Gurus forum. Register a free account today to become a member! It's completely free. Once signed in, you'll enjoy an ad-free experience and be able to participate on this site by adding your own topics and posts, as well as connect with other members through your own private inbox!

How to make design to have realistic woven/knitted effect?


nmskyler0405

New Member
Messages
4
Likes
3
Hi everyone,

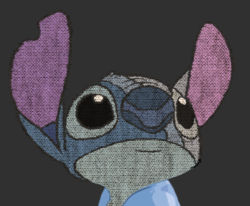
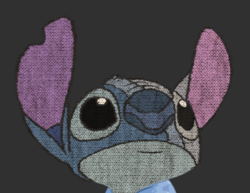
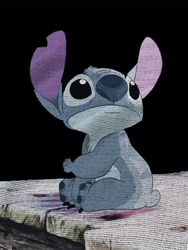
I would like to turn any design in a way that it looks woven/knitted exactly like this image below:
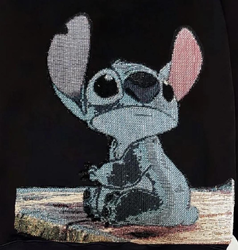
1655950839876.png
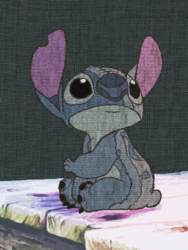
As you can see, there is a knitted effect on top and the design itself looks kind of...distorted or pixelated? I don't really know the exact word to describe it. But I did attempt to replicate this effect for any design that I want but the result wasn't satisfying. So the first step that I did was to find the original image:
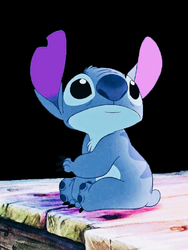
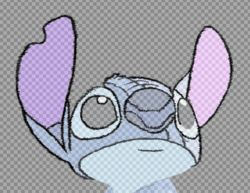
1655951136828.png

With the design layer selected, I then went into Filter Gallery and applied "Cutout" filter onto the design with this setting:
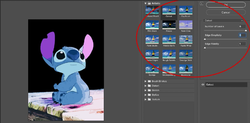
1655951196535.png

After that, I noticed the example image looks a bit dim and gritty so I went ahead and decreased the saturation of the design:
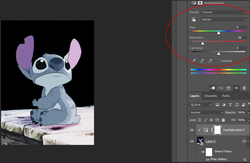
1655951265351.png

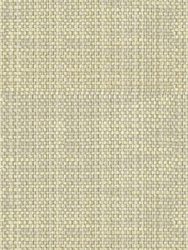
Then I went to the internet to find myself a woven/knitted texture so that I can applied it on top of the design. With a texture chosen, I immediately extracted the texture's shadow using alpha channel and put it on top of the design and lower its opacity to make them blend in together:
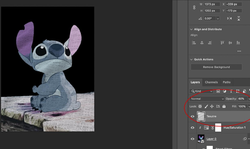
1655951345856.png

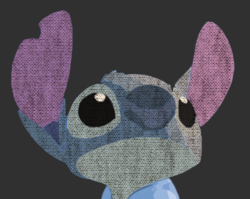
When everything is done, I'm left with this result that still doesn't look anywhere close to the example image:
1655951374454.png

I'm sure that there's much more you can do to achieve the desired result but with my limited ability in photoshop, this is as far as I could go. I tried looking up tutorials on youtube and google but to no avail as well as went to different photoshop forum for help but no one seems to know how to do it, so I decided to come to this forum for help. Does anyone know what should be done or any techniques that could help me achieve the same or as close as possible result to that of the sample image? Please refer to the original image above if you would like to demonstrate. That would be greatly appreciated!

So to sum up:
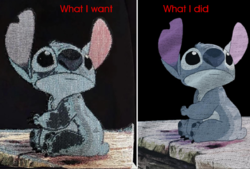
Screen Shot 2022-06-23 at 12.33.50 pm.png

Thanks in advance.
 

Rich54

Guru
Messages
1,739
Likes
3,425
  • Start with your original base image as the bottom layer.
  • Then find a sample of a textured fabric, like this. Copy this fabric on a new layer above your base image.
  • As an optional step, convert the fabric texture to Black & White. (Or don't... whichever you like better.)
  • Change the layer blend mode of the fabric layer. You should experiment with all the different blend modes to see what they do, but Multiply and Linear Burn come closest to matching your example. I used Linear Burn in the image down below.
  • You should try to find a fabric image that is a lot larger than your base image. That gives you the option to scale-down the fabric to reduce the size of the texture and make it more fine-grained, if you like.

1655952894534.png


1655953293378.png
 

nmskyler0405

New Member
Messages
4
Likes
3
  • Start with your original base image as the bottom layer.
  • Then find a sample of a textured fabric, like this. Copy this fabric on a new layer above your base image.
  • As an optional step, convert the fabric texture to Black & White. (Or don't... whichever you like better.)
  • Change the layer blend mode of the fabric layer. You should experiment with all the different blend modes to see what they do, but Multiply and Linear Burn come closest to matching your example. I used Linear Burn in the image down below.
  • You should try to find a fabric image that is a lot larger than your base image. That gives you the option to scale-down the fabric to reduce the size of the texture and make it more fine-grained, if you like.

View attachment 130699


View attachment 130700
Hey there thanks to this I end up learning a thing or two from you but the result isn't quite what I want. Regardless, thanks for the attempt!
 

IamSam

Administrator
Staff member
Administrator
Messages
22,765
Likes
13,269
There's a story that goes with this project! Will tell later.........now it's off to work.

Working on this.

Here's a preview.....

Screen Shot 2022-06-23 at 9.26.48 AM.png
 

IamSam

Administrator
Staff member
Administrator
Messages
22,765
Likes
13,269
Story.........In all the years I have been using Ps on a mac, I have NEVER had any problems whatsoever!! None!!! Last night I had a full blown catastrophic crash and burn of Ps that required several hours to repair! Was not expecting this and it was a major wake up call for me!

I had this project almost completely finished and I lost it all! Waaaa.

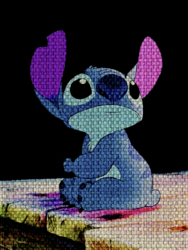
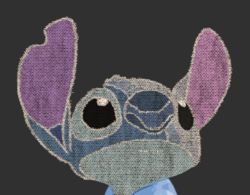
Anyway, here's where I am at the moment. It's not exactly like the example photo...............but it's fairly reasonable.
@nmskyler0405 - if this is anything closer to what you want, let me know and I will give you the basic technique I'm using.
Also remember.........I'm using generic fabric and this can be used with any fabric texture you like.

Screen Shot 2022-06-23 at 8.14.31 PM.png
 

nmskyler0405

New Member
Messages
4
Likes
3
Story.........In all the years I have been using Ps on a mac, I have NEVER had any problems whatsoever!! None!!! Last night I had a full blown catastrophic crash and burn of Ps that required several hours to repair! Was not expecting this and it was a major wake up call for me!

I had this project almost completely finished and I lost it all! Waaaa.

Anyway, here's where I am at the moment. It's not exactly like the example photo...............but it's fairly reasonable.
@nmskyler0405 - if this is anything closer to what you want, let me know and I will give you the basic technique I'm using.
Also remember.........I'm using generic fabric and this can be used with any fabric texture you like.

View attachment 130718
Hi @IamSam
That is just awesome. Like I've mentioned in the thread, I want to achieve as close as possible result and this is exactly what I want. Would you be able to share with me what technique you used? That would be greatly appreciated!
 

IamSam

Administrator
Staff member
Administrator
Messages
22,765
Likes
13,269
OK.......this is a simple clipping mask technique.

First I followed your exact same technique in using the "Cutout" filter in filter gallery in order to have partitioned areas of color to select.

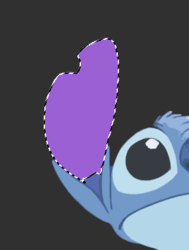
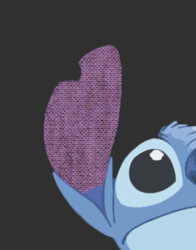
Use whatever tool/method you are comfortable with to make a selection of an area. Here is the right ear.
I used the Quick Selection Tool.
Screen Shot 2022-06-24 at 9.05.26 PM.png

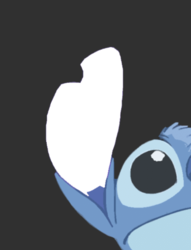
On a new layer, fill the selection with white (the color is actually irrelevant) and label the layer " right ear template".
Screen Shot 2022-06-24 at 9.05.51 PM.png

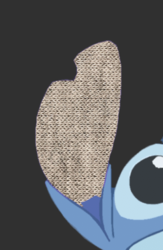
Now open a fabric layer above the white right ear template layer.
Right click the fabric layer and choose "create clipping mask".
Note: you may have to use free transform and/or the Move Tool to position the fabric.
Screen Shot 2022-06-24 at 9.05.59 PM.png

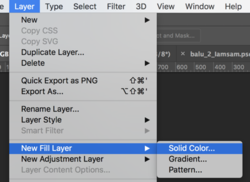
Now that the "clipped" fabric layer is set, we need to add a solid color adjustment fill layer.
Go to LAYER > NEW FILL LAYER > SOLID COLOR.
Screen Shot 2022-06-24 at 9.15.23 PM.png

Right click the new solid color fill adjustment layer and choose "create clipping mask".
Now set the new solid color fill adjustment layers blending mode to "Multiply".
Adjust your color to suite your needs. Here I sampled the original ear color and used that.
Screen Shot 2022-06-24 at 9.06.10 PM.png

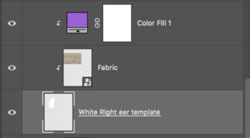
Here's what the 3 layers used to accomplish this effect will look like....
Screen Shot 2022-06-24 at 9.10.37 PM.png

Then it's just a matter of continuing this process with each of the colored areas until you are done!
(Not done, but most of the head done!)
Screen Shot 2022-06-24 at 9.25.28 PM.png

Next I will explain how to add the black outline...................here's a clue............it's the same exact process!
 
Last edited:

IamSam

Administrator
Staff member
Administrator
Messages
22,765
Likes
13,269
OK, the outline is the same technique.

On top of the layer stack, create a new layer called "Outline layer"
On this layer you are only going to use the Brush Tool set to a dark color...........again the color does not matter since we are going to clip a fabric and color fill adj layer to it!

With the Brush Tool, you will begin creating a squiggly outline of the character.
Here I used black and a small hard round brush to create the outline. It's squiggly in order to simulate a fabric edge.
Screen Shot 2022-06-24 at 9.39.52 PM.png

Then I clipped several fabric layers positioned so that all of the black outlines were covered.
Note, that even though we used a black colored brush, the outline will be the same color as the clipped fabric layers.
Screen Shot 2022-06-24 at 9.44.26 PM.png

We add color the same way we did i the previous post.
Add a new solid color fill adjustment layer.
Right click the new solid color fill adjustment layer and choose "create clipping mask".
Now set the new solid color fill adjustment layers blending mode to "Multiply".
You can now set the color of the fabric outline. Here I used black and lowered the layers opacity.
Screen Shot 2022-06-24 at 9.49.25 PM.png
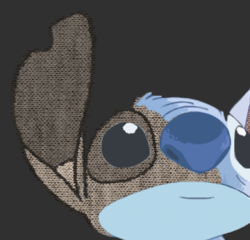
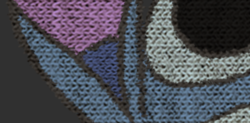
Up close....
Screen Shot 2022-06-24 at 9.51.24 PM.png

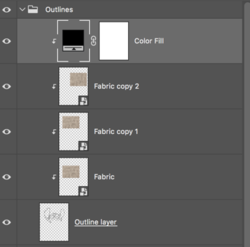
Outline layers.........grouped.
Screen Shot 2022-06-24 at 9.51.59 PM.png

If you have any questions, please feel free to ask!!!
 

nmskyler0405

New Member
Messages
4
Likes
3
OK, the outline is the same technique.

On top of the layer stack, create a new layer called "Outline layer"
On this layer you are only going to use the Brush Tool set to a dark color...........again the color does not matter since we are going to clip a fabric and color fill adj layer to it!

With the Brush Tool, you will begin creating a squiggly outline of the character.
Here I used black and a small hard round brush to create the outline. It's squiggly in order to simulate a fabric edge.
View attachment 130746

Then I clipped several fabric layers positioned so that all of the black outlines were covered.
Note, that even though we used a black colored brush, the outline will be the same color as the clipped fabric layers.
View attachment 130747

We add color the same way we did i the previous post.
Add a new solid color fill adjustment layer.
Right click the new solid color fill adjustment layer and choose "create clipping mask".
Now set the new solid color fill adjustment layers blending mode to "Multiply".
You can now set the color of the fabric outline. Here I used black and lowered the layers opacity.
View attachment 130748
Up close....
View attachment 130751

Outline layers.........grouped.
View attachment 130752

If you have any questions, please feel free to ask!!!
Wow thanks a lot @IamSam , the result is just superb and I honestly couldn't have asked for a better one. I run a woven blanket store and would like to create a mockup to clearly show the customers that the designs are handmade and not printed, you've helped me achieve this goal. Once again, thank you for this tutorial and please take care of yourself!! :cheesygrin:
 

IamSam

Administrator
Staff member
Administrator
Messages
22,765
Likes
13,269
You're very welcome! Again, if you have questions, let me know.
 

Top