Photoshop Tutorials
Spirograph Patterns
So, for our particular purpose here, we'll have to create a basic shape manually first, then we'll rotate copies of that shape around to create a more complex pattern. For creating basic patterns, I find the following method produces the best looking results.
| Step 1 |
White Background / 400x400 (equal proportions) / 72dpi.
| Step 2 - Create a primary shape |
Draw a circular selection with the circular selection tool - and hold down the Shift key at the same time if you want a 'perfect' circle. Make this selection shape a little less than half the height of the canvas area.
| Step 3 |
| Step 4 |
Now, press Ctrl+A (select All), then Ctrl+C (Copy), then Ctrl+D (Deselect). This copies our 'centered' circle, which we'll use to build a more complex pattern.
| Step 5 - Readjust the shapes position |
Hold the Shift key down while pressing the up arrow key 5 times.
Make sure the shape isn't going off the top of, and beyond the canvas.
| Step 6 - Create a basic pattern |
Press Ctrl+V (Paste).
Pick the Move tool, hold the Shift key down, and press the right arrow key 5 times.
Repeat the above step 2 more times - naming the new layers 'circle 3' and 'circle 4'. And move 'circle 3' to the left, and 'circle 4' down.
You should then have a simple looking flower or clover pattern.
| Step 7 - Create a more complex shape |
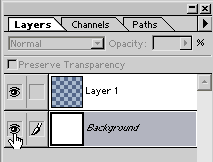
 Turn off the Background layer (click the eye icon on the left side; see sample image), and then press Ctrl+Shift+E (Merge Visible). This merges all of our visible circle layers into just 1 layer. Rename this layer 'shapes 1'. Now click the 'eye' beside the Background layer to make it visible again.
Duplicate the 'shapes 1' layer.
Open the 'Numeric' transform function window
(EDIT/Transform/Numeric...)
(PS6 Users: press Ctrl+T).
In the 'Rotate' text box type '45'. Press OK to apply the change.
We now have a more complex pattern.
You can either stop here, or continue to develop the pattern further.
| Step 8 - A more complex pattern |
Duplicate the layer, and name it 'shapes 2'.
Open the 'Numeric' transform function window (EDIT/Transform/Numeric...)
(PS6 Users: press Ctrl+T).
In the 'Rotate' text box type '22.5'. Press OK to apply the change.
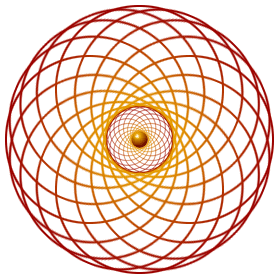
We now have a pattern much more complex than our previous one.
| Step 9 - Add extra detail |

T I P S
To make this pattern even more complex, you can merge your shape layers together, duplicate the layer, and start over from step 4.
Try using other shape selections. The circle works well, but a square can produce quite an interesting looking pattern also.
Try using an oval shape - taller than it is wide.
Use a triangular shape, that should prove interesting!
How about using solid color filled shapes instead of outlines? Could be useful right? Try it!
Copyright © Mark Anthony Larmand
For help, advice, tips and tricks, challenges, feel free to visit our![]()


