


Photoshop Tutorials
Custom Brushes
Learning to do this will be one of the easiest things you do, where Photoshop is concerned. Once you finish this tutorial, you'll be making your own brushes without giving it a second thought. And you'll actually get a lot of enjoyment and satisfaction from doing this too.
Note to mac users The PC key "Ctrl" = the Mac key "Cmd". And the PC key "Alt" = the Mac key "Option".
| Step 1 |
| Step 2 |
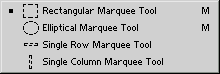 Open a photo into photoshop now, and use the rectangle selection tool to select a small area of the photo (about 100x100 pixels). Your brush can actually be as large as your system memory will allow, and so can your brush palette. This small size is just for demo purposes here. A brush can also be any shape you want. And you can use any of the drawing or painting tools to create custom brushes.
| Step 3 |
| Step 4 |
| Step 5 |
A window will appear, allowing you to name your new custom brush. And after that... Voila! A new brush!
If after trying the brush out you decide you'd like to delete it and try it again, simply either right-click on that brush in the palette and choose Delete Brush from the pop-up menu, or hold down the Ctrl/Cmd key and click on the brush in the palette. You'll see a small pair of scissors appear when you hold the Ctrl/Cmd key while your mouse is over a brush.
- You can delete any brushes you want from your palette, and replace them with your own custom brushes.
- You can also build a larger brush palette by choosing 'Load Brushes' from the Options menu. The newly loaded brushes will be appended to the palette that you already have loaded; unless you specifically choose otherwise.
- When you've created your own custom brush set, click on that little arrow to the right again (that's the palette's Option menu), and choose 'Save Brushes' from the list. Navigate your system until you find your Photoshop folder and save this new palette in the 'Brushes' folder within the Photoshop folder. Give the palette file any name you like.
NOTE: The system path to my Brushes folder is this: "[drive letter]:\Program Files\Adobe\Photoshop 6.0\Presets\Brushes". Your's should be similar, unless you using a Mac. In that case, your path may start at the word '\Adobe\'.
- The last palette you have open when you close Photoshop, will be the palette that is there the next time you start Photoshop, and until you 'Replace' it with another palette, via the Options menu.
- Choosing 'Reset Brushes' from the palette's option menu will load Photoshop's small default set of brushes that came with the program.
- Choosing 'New Brush' from the Options menu will allow you to create a new 'Air Brush' or 'Pencil' brush. Creating a brush this way allows you a few more options than creating a brush from a photo or drawn image. For instance, it will let you choose how soft or hard the edges of the brush will be by default. You don't get that option when creating a brush from a photo or drawn image, but you can always just edit those settings 'on-the-fly' whenever you use a brush.
- You can also create a brush out of text as well. Some interesting text effects can be achieved this way. Go ahead and experiment with that a bit. You can always just delete the brush afterwards, so there's nothing to lose in playing with it.
- Experiment with changing the brush's Opacity level in the Options palette for the brush tool. Not the Options menu for the brush 'palette', but the options palette for the brush 'tool'.
Doing and becoming familiar with these things will get you feeling more confident about brushes in general.
Just remember these two simple modes of thought:
1) Nothing is ever permanent where Photoshop is concerned - don't be afraid to play with things... a lot!
2) Anything that you do in Photoshop that is important to you - including custom brush making - SAVE IT... OFTEN!
For some basic review, plus even more information on using and creating custom brushes, check out More Brush Tips.
Have fun!
Copyright © Mark Anthony Larmand
For help, advice, tips and tricks, challenges, feel free to visit our![]()