


Photoshop Tutorials
Fun with Layer Masks
Note: This tutorial can be done using any version of Photoshop.
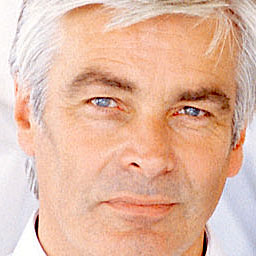
Ok lets start by having you save the photo provided here, onto your own system. Right-click the photo and choose "Save" or "Save As...". Then open this photo into Photoshop. This photo is actually 2x the size seen here.
T I P: If you have Photoshop open right now, and if you resize or move your browser window so that you can see the background work area of Photoshop, then you can just click, hold, and drag this photo into Photoshop instead of having to save it to your desktop first.
| Step 1 |
...or you can also do this by opening the LAYER menu and choosing "Add Layer Mask":
If your photo is your "Background" layer, do this:
A Layer Mask though cannot be added to a Background layer in Photoshop. Therefore, you need to change your photo layer into a normal, editable layer first; before we can do anything to it. Double-click the photo layer, then click the OK button in the window that comes up. Now it'a a normal layer. And now we need to create a white background layer that will show up behind our photo layer. Add a New Layer, and make sure it's filled with white. Then drag this layer below the photo layer.
| Step 2 |
Press Ctrl/Cmd+Shift+I to invert the selection. Fill this selection with Black. Then Deselect, and apply a Gaussian Blur of about 3-5 pixels -- depending on how quickly you want your edges to appear to fade out.
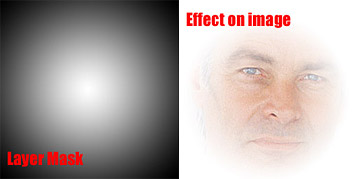 In the example image shown here, I've actually just created a Radial gradient on my Layer Mask. Take specific note that the areas of the Layer Mask that are white, are where the photo/image will show through. Black on a Layer Mask creates transparency.
| Step 3 |
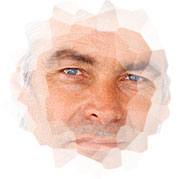 .
.The image effect seen here shows how applying the "Crystallize" filter (FILTER/Pixelate/Crystallize...) to a Radial gradient layer mask (like the one used in the above example) would look. Try the "Pointillize" filter too for a similar effect.
T I P The "Levels" filter was used on the effected Layer Mask to strengthen and alter the effect.
 And here's another good example to the left. This layer mask was effected using first, a "Diamond" gradient, then the "Color Halftone" (FILTER/Pixelate/) and "Tiles" (FILTER/Texturize/) filters were applied to it. For the thin strip of tiles, I selected a rectangular area, Feathered the selection by 10 pixels, filled the selection with white, and then ran the "Tiles" filter on the still selected area.
Ok so now it's your turn to start experimenting folks!
Good luck, and have fun!
T I P S
- To increase or decrease the effect of the Layer Mask, modify the Layer Mask directly* using the "Levels" filter -- Ctrl/Cmd+L. *(click on it to activate it before editing)
- If you need to see just the Layer Mask by itself, to make it easier to edit/create it, then hold the ALT/Option key down while clicking on the Layer Mask. To make all layers visible again, just click on any normal layer.
Copyright © Mark Anthony Larmand
For help, advice, tips and tricks, challenges, feel free to visit our