


Photoshop Tutorials
Quick 3D Text

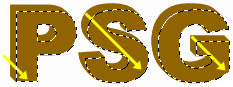
| Step 1 |
Attributes: 300x150 pixels / RGB / White Background.
| Step 2 |
Photoshop 5+ users: Render your type layer first before continuing.
Photoshop 4 users: check to make sure the 'Preserve Transparency' checkbox is Un-checked after you've entered your type to a layer, and Deselect the text if it has become selected.
| Step 3 |
Then activate the Text 2 layer (click on it). And turn Off the eye icon for the Text 1 layer. We don't need to see it right now. Fill the Text 2 layer with a darker shade of your original text color I chose a medium brown as the shadow color of my orange text. (read the Hint on the right)
T I P: To fill the contents of a layer quickly without having to load a selection, or turn on the Preserve Transparency option, Do This:
Press the Shift key at the same time as you press the Ctrl+Delete keys. This will 'temporarily' protect your layer's transparent areas, while you apply your color fill. Try it!
Once you've changed the color of the Text 2 layer, press Ctrl+A (Mac: Command+A) to select ALL of the contents of the layer. Then press Ctrl+H (Mac: Command+H) to hide the selection marquee, so we can see what we're doing.
| Step 4 |
Now, choose the Move tool from the tool palette, and press the Alt key (Mac: Option) and hold it down. While holding it down, press once on the right arrow key, then once on the down arrow key. Do this alternately 7 times (right, down, right, down, etc.etc). This will give our text a thickness of 7 extra pixels in the direction we're moving our selection.
T I P: Holding the Alt/Option key down at the same time we move our selection, creates a copy of whatever we have selected. And by moving our selection only 1 pixel at a time, our copies get overlayed on top of each other, which makes them appear as a solid shape.
Problems? Is nothing being copied when you move your selection down? Then have a look to be sure that the 'Preserve Transparency' option is Un-checked for the 'Text 2' layer (which is the one you should be working on).
| Step 5 |
By-the-way... this 'thickening' technique can be applied to any kind of 2D shape or pattern, not just text.
Now for some twisting and bending of the previous steps, to get ourselves a few slightly more embellished effects!
T I P S:
 The above effect can be developed a little further by simply adding a subtle bevel effect to the letters. This is easy.
Just Duplicate the 'Text 1' layer, fill it with White, and apply the Emboss filter to the layer.
Try using these settings for it:
Angle=45 / Height=4 / Amount=500 (maximum).
Then set the embossed layer's Blend Mode to Soft Light. (For a stronger effect, set it to Overlay) And if the edges of the embossed effect look a little too harsh, UNDO the filter and apply a soft blur to the text first - Filter/Blur/Blur.
 Or, for another look try this... (but first, if you did the previous tip turn Off the eye icon for the embossed layer we just did).
Ctrl-click (Mac: Command-click) the 'Text 1' layer to create another selection of the text. Now create a New Layer. The new layer should appear/or be moved to the top of the layers palette; above the previous embossed layer we just did. Then go to the Edit menu and choose Stroke. Stroke the selection by 8 pixels / in the Center. Click OK to apply.
Leave the selection on and press Ctrl+Shift+I (Mac: Command+Shift+I) so our selection becomes inverted. Now hit Delete. And then Deselect the text. Then apply a soft Blur to the outline - Filter/Blur/Blur More.
Go to the Emboss filter again and leave all of the settings the same except for the Height - change that to 2. Click OK to apply. Done! So there's another way to spruce up the 'traditional' 3D text effect.
Adding these two bevel effects together will create a 'double bevel' effect on the letters. Turn on the eye for the other bevel effect now and see what they look like combined.
 And now for the finisher! I'm about to explain to you how by making a few simple adjustments to the above layers, you can arrive at the glossy styled effect you see here. It's really QUITE simple!
To start with, activate the 'Text 2' layer. Now turn down the Opacity of the layer to about 20%. This amount will vary depending on just how dark of a color you chose for this layer. Just adjust it down until it looks more like a faint shadow - like the sample here to the right.
Next... Create a New Layer. It should appear right above the 'Text 2' layer. Then Ctrl-click (Mac: Command-click) the 'Text 1' layer to create a selection, and fill the selection on the new layer with an even darker shade of the color you chose for the 'Text 2' layer. If there isn't one, or one you like, then just use black (we're making a Base shadow). Now deselect, and apply the Blur More filter to this layer. Then pick the Move tool from the tools palette and hit the down arrow key twice. And finally, turn down the Opacity for this layer to 50%.
Next we come to the embossed layers.
Activate the top embossed layer (Guru Tip #2 - the outlined one), and change its Blend Mode to Color Dodge. And turn the layer's Opacity down to 20%. Then activate the layer below that (Guru Tip #1 - the other embossed layer), and change its Blend Mode to Overlay. Now pick the Move tool again and tap the Up arrow key twice to nudge this layer up 2 pixels. Done! Too easy huh? ;?)>
 Note: The look of the glossy effect may vary somewhat depending on what shade of colors you chose to use. Experiment with different colors to see how it changes the look of the effect. For the green sample here, I had to change the Blend Mode of the first embossed layer back to Soft Light instead of using Overlay. Overlay made the dark reflection lines around the text too dark. Using Soft Light fixed that. I also had to fill the shadow layer with a darker green to match the text color Experiment!
Creating a 'traditional' 3D text effect may not be something you'd want to do a lot. But for flyers, brochures, and other simple print mediums (and for the Web), it can be a good thing to know how to do. And why not? It just means you'll learn more about how to use Photoshop, right?
Besides... it's not the end result that counts as much, but rather, knowing how to get there.
Have fun!
Copyright © Mark Anthony Larmand
For help, advice, tips and tricks, challenges, feel free to visit our