


Photoshop Tutorials
Chiseled and Carved Text
PAGE 1 / 2
 I'll start by saying just how VERY simple this effect really is. And no, that's not an insult to those of you that can't figure out what needs to be done to pull off this effect. It's a point I'm making that with a little creative thinking, and some general knowledge of Photoshop's vast abilities, this kind of effect, or any other kind, can be figured out in a very short time.
Why this effect is special... (please excuse my vanity) ;)
The Alpha Channel creating technique I'm about to show you (which is what makes the effect work) is an original method I figured out. I have yet to see this technique anywhere else, on the Web or in a book; so if it's out there, someone's hiding it!. Its overall usefulness stretches far beyond this simple chiseling effect. I originally created it for use with my Vector art programs, as a way of creating better looking gradients after they were optimized.
Keep that in mind after you see how to do it.
And I'm proud to share it with everyone here!
Here we go...
Creating a simple surface texture: a cement or concrete wall.
| Step 1 |
Attributes: 400x250 pixels / RGB / White Background / 72dpi.
| Step 2 |
| Step 3 |
Use the following settings:
Texture = Sandstone
Scaling = 100 percent
Relief = 6
Light Direction = Top Left
Invert checkbox ticked ON.
Click OK to apply.
Then Duplicate this layer and name it Chiseled text.
| Step 4 |
T I P Straight-lined, or 'engraved' styled fonts will produce a more authentic looking effect. But any font (or glyph) can actually be used. Round fonts however will not produce as clean or hard of an edge down the middle of the letters
| Step 5 |
| Step 6 |
Now read this carefully:
Repeat step 6 exactly the same way you just did. But each time you repeat it, change the Foreground color to the next level of gray in your palette. You will keep repeating step 6 until your Foreground color choice is white. So, since there are only 4 levels of gray in the Web Safe palette, the total number of times step 6 should be done is 5 - once for every level of gray in the palette, and once more for white.
In case you aren't using the Web Safe palette, here are the RGB settings for the 4 levels of gray you'll need:
| dark gray | RGB - 51.51.51 | HEX - 333333 | |
| med. dark | RGB - 102.102.102 | HEX - 666666 | |
| medium gray | RGB - 153.153.153 | HEX - 999999 | |
| light gray | RGB - 204.204.204 | HEX - CCCCCC |
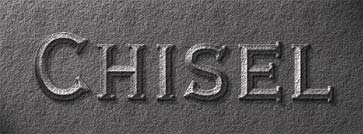
 When you've finished repeating step 6 your text should look very similar to this type of effect.
Now 'link' all of the text layers together; click in the small empty space between the eye icon and the layer's thumbnail image. Then press Ctrl+E and all of the linked layers will become merged into one layer.
This is our special alpha channel effect!
Note If you see any type of banding effect between the levels of gray in the text, select the text and apply the Blur More filter to it. Don't over-blur it though or the pipe gradient effect will become washed out, and ineffective
| Step 7 |
Call it Alpha texture (because that's what it will be used for). Now you need to select All; Ctrl+A, and Copy this layer; Ctrl+C. Now open the Channels palette and create a new channel. The channel should be filled with black. Then press Ctrl+V and paste the text into it, and then Deselect it; Ctrl+D.
Name this channel 'alpha original', then Duplicate the channel, and name that one 'alpha chisel'. That's it, we're ready to start carving our surface texture now with the Lighting Effects filter.
PAGE 1 / 2
Copyright © Mark Anthony Larmand